This is the chocolate chip cookie of dreams, the kind that will make your home smell – in the best possible way – like a shopping mall cookie-vending concession. In honour of those, it’s a giant traybake cookie, but with a distinctly grown-up edge from the sage and sea salt. Use the darkest, best quality chocolate chips you can find and a generous hand with the sea salt.
Serves: depends how much cookie you eat – 6 hungry, 8 moderate, 10 abstemious
Prep: 10 minutes
Cook: 20–25 minutes
225g soft light brown sugar
250g softened unsalted butter, plus more for the tin
10 fresh sage leaves, finely chopped, plus 4–5 left whole
2 medium free-range eggs
350g plain flour
½ teaspoon baking powder
1 teaspoon sea salt flakes
100g dark chocolate chips (70% cocoa solids minimum)
Preheat the oven to 160°C fan/180°C/gas 4 and butter and line a 26cm round pie dish or similarly volumed rectangular roasting tin with non-stick baking or greaseproof paper.
Beat the sugar, butter and chopped sage leaves together, then whisk in the eggs. Stir in the flour, baking powder and ½ teaspoon of sea salt flakes until evenly incorporated, then quickly stir through the chocolate chips.
Alternatively, put everything into a food processor except the chocolate chips and blitz quickly until smooth. Remove the blade, then stir the chips through.
Flatten the cookie dough into the prepared tin, then scatter over the remaining sage leaves and sea salt flakes. Transfer to the oven and bake for 20–25 minutes, until just firm on top – the inside should still be soft. (Check after 15 minutes if you’ve used a very large roasting tin and the cookie dough has gone in thinly.)
Serve warm, ice cream optional. This reheats very well in slices.
CHOCOLATE, SAGE & SEA SALT GIANT COOKIE
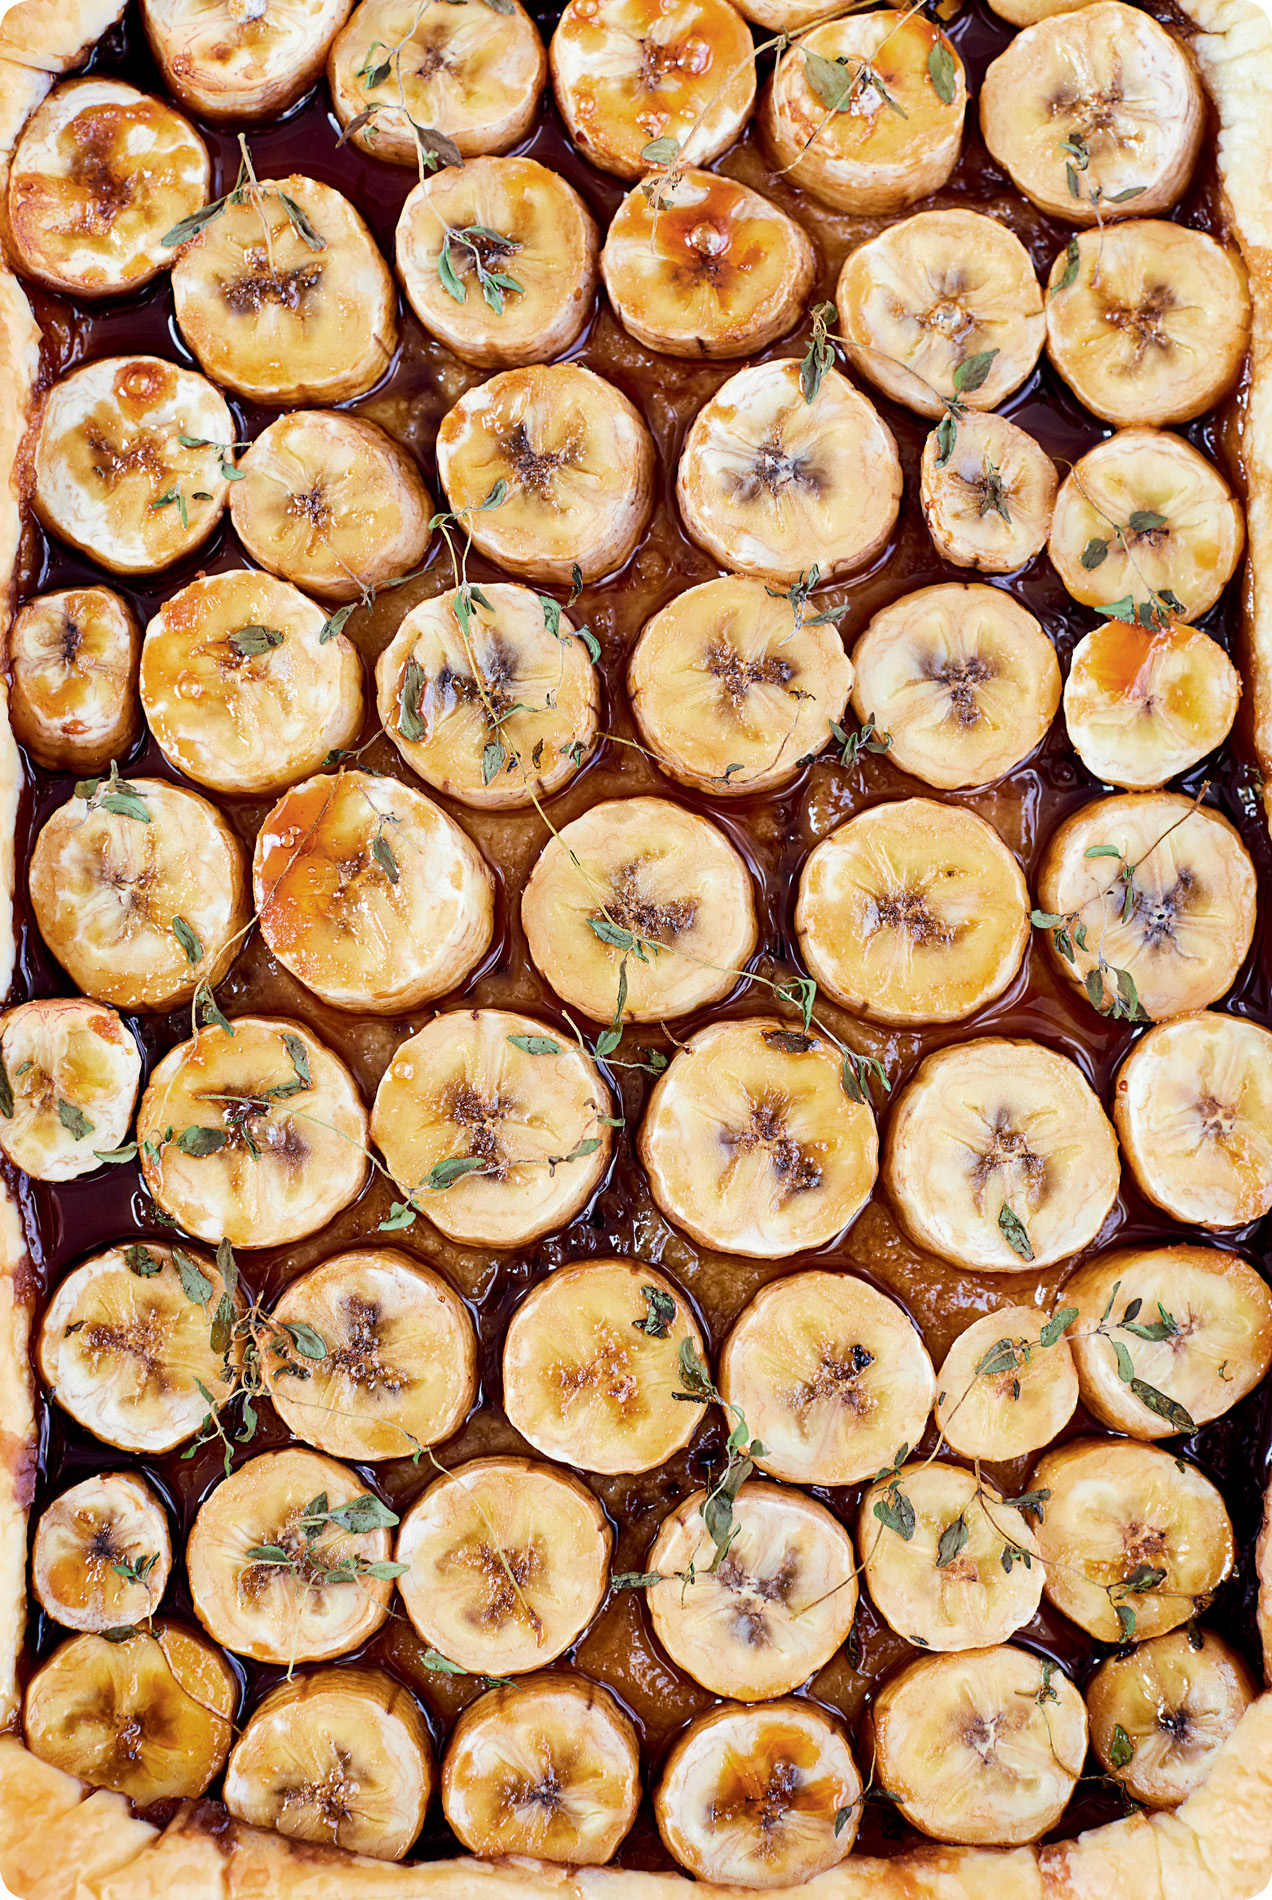
BLACKBERRY & PISTACHIO CAKE
In this dense, rich cake, the pistachio gives an almost baklava-like flavour and works perfectly with the blackberries. David Loftus, the photographer for this book, very kindly said that if he’d been served a little square of this in a Michelin-starred restaurant, he’d have been very happy, so consider impressing your friends with it after dinner. Best eaten the day it is made, on account of the fruit.
Serves: 8
Prep: 10 minutes
Cook: 25 minutes
150g unsalted, shelled pistachios
170g softened unsalted butter, plus more for the tin
170g golden caster sugar
3 free-range eggs
30g self-raising flour
1 teaspoon baking powder
200g blackberries, halved if very large
Icing sugar, to dust
Preheat the oven to 160°C fan/180°C/gas 4, and line and butter a 28 × 22cm roasting or baking tin with non-stick baking or greaseproof paper. Blitz the pistachios in a food processor, spice grinder or Nutribullet until very finely ground (but don’t over-blitz, or they’ll get oily).
Beat the butter and sugar together until smooth, then whisk in the eggs. Stir in the ground pistachios, flour and baking powder and mix briefly until combined.
Tip the cake batter into the prepared tin and dot with the blackberries. Transfer to the oven and bake for 25 minutes, until the cake is risen, firm to the touch, and a skewer inserted into a non-blackberry bit comes out clean. Do not panic if the cake has risen like a glossy quilted blanket to hide all your blackberries – this will particularly happen with small berries – they’re still there and the cake will taste delicious.
Let the cake cool in the tin for 5 minutes before transferring it, with its paper, to a wire rack to cool down. Dust with icing sugar before serving.
CHANGE IT UP: For a gluten-free version of the cake, leave out the flour and increase the amount of ground pistachios by 20g, to 170g in total. Make sure your baking powder is gluten-free.
BLACKBERRY & PISTACHIO CAKE
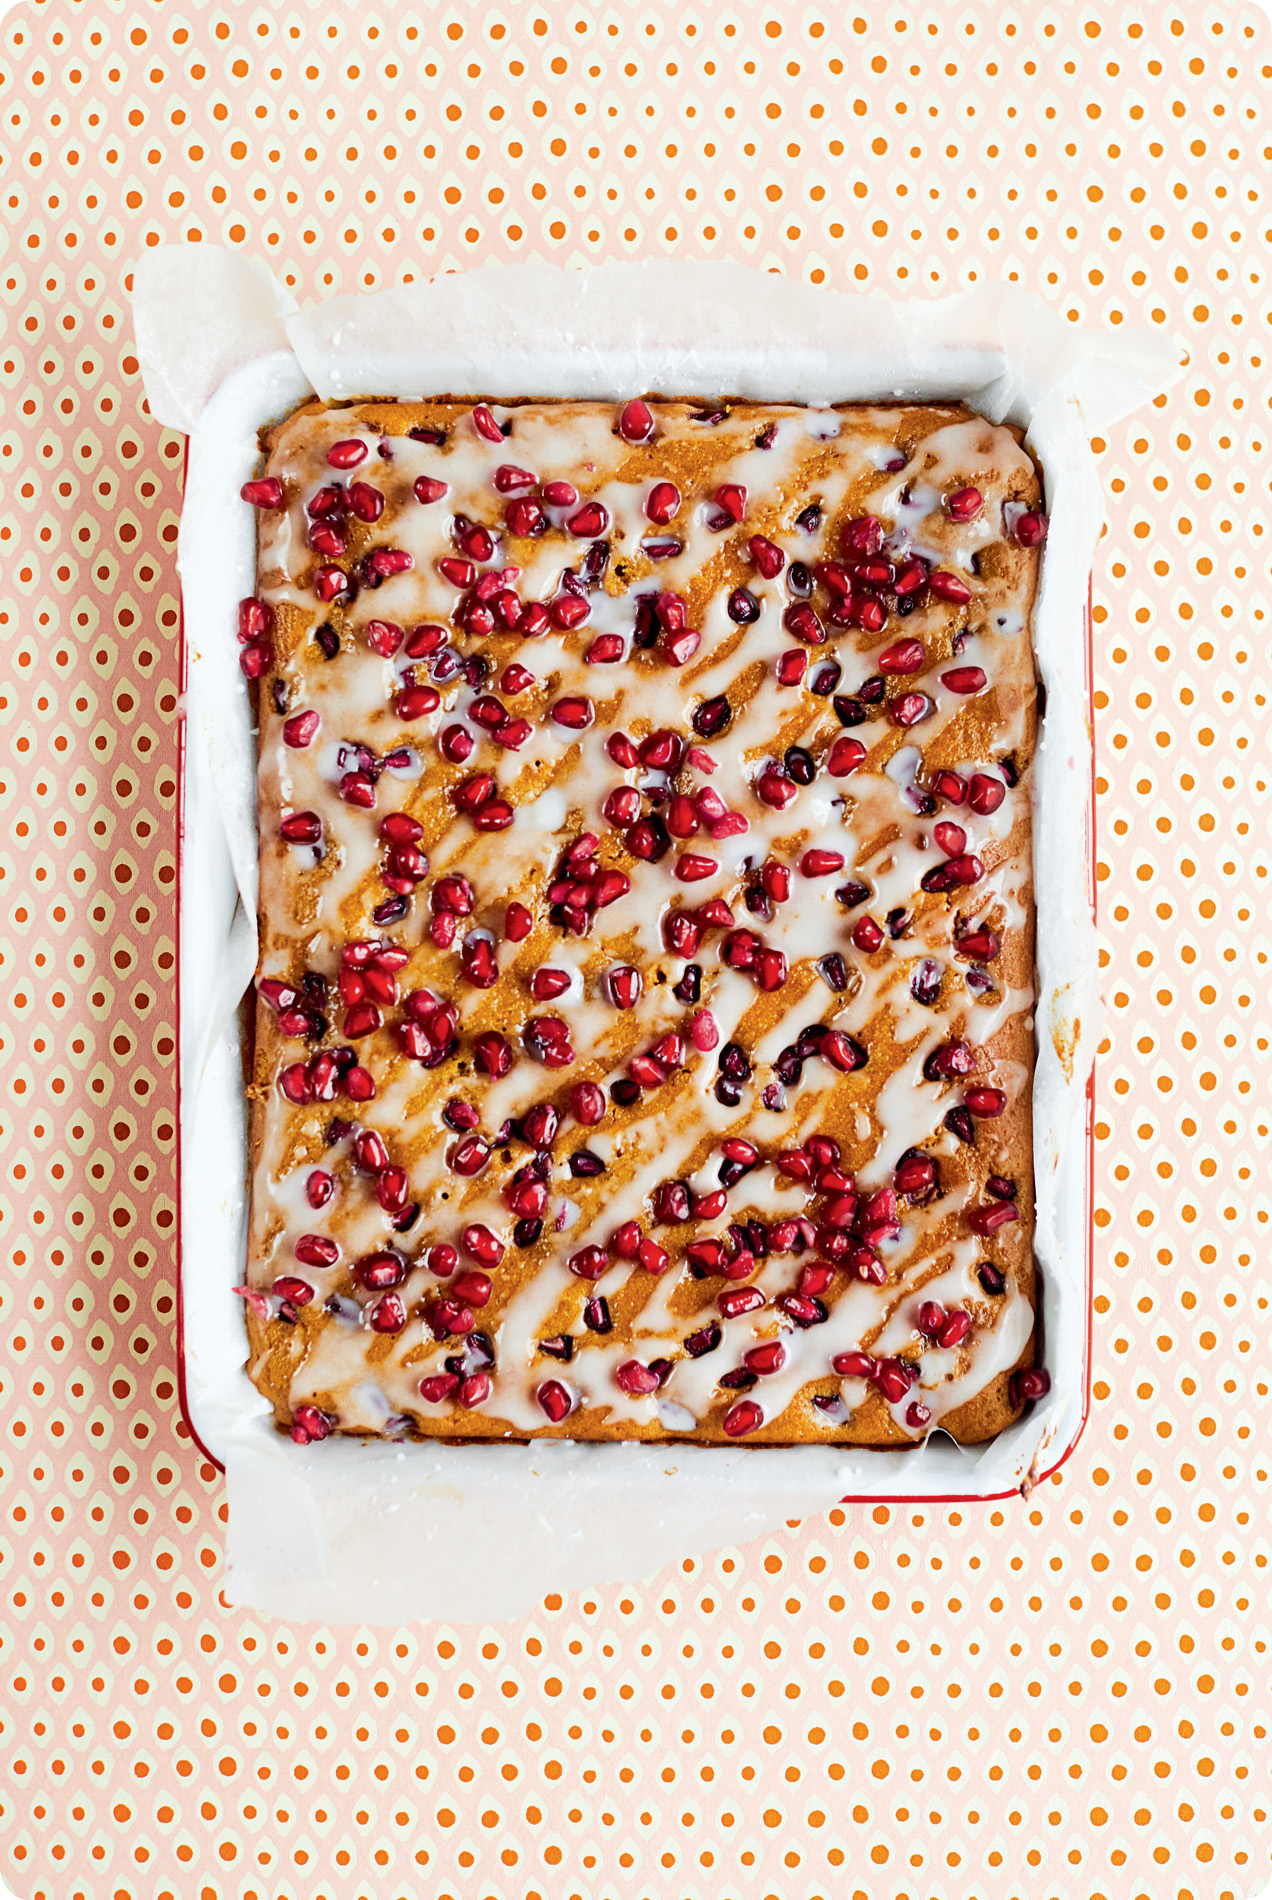
POMEGRANATE YOGURT CAKE
I love the texture of a cake made with yogurt instead of butter and this version is quite unusual, with fresh pops of flavour from the pomegranate seeds which contrast with the undertones of dark caramel and acidity from the molasses. A Persephone-in-the-underworld cake.
Serves: 8
Prep: 10 minutes
Cook: 20–25 minutes
80ml olive oil
125g full-fat natural yogurt
60ml pomegranate molasses
2 large free-range eggs
90g soft dark brown sugar
½ teaspoon ground cinnamon
200g self-raising flour
1 scant teaspoon baking powder
1 pomegranate, seeds only
FOR THE ICING
3 heaped tablespoons icing sugar
½ tablespoon water
Preheat the oven to 160°C fan/180°C/gas 4. Whisk the olive oil, yogurt, pomegranate molasses and eggs together, then beat in the sugar. Stir in the cinnamon, flour and baking powder, then spoon into to an 28 × 22cm lined roasting or baking tin lined with non-stick baking or greaseproof paper.
Scatter over half the pomegranate seeds, then transfer to the oven and bake for 20–25 minutes, until a skewer inserted comes out clean. Let it cool in the tin for 5 minutes before transferring to a wire rack.
Mix the icing sugar and water together for the icing, then drizzle this all over the cooled cake. Scatter over the remaining pomegranate seeds before serving.
NOTE: As this cake has fresh fruit in and on it, it’s best eaten on the day you make it.
POMEGRANATE YOGURT CAKE
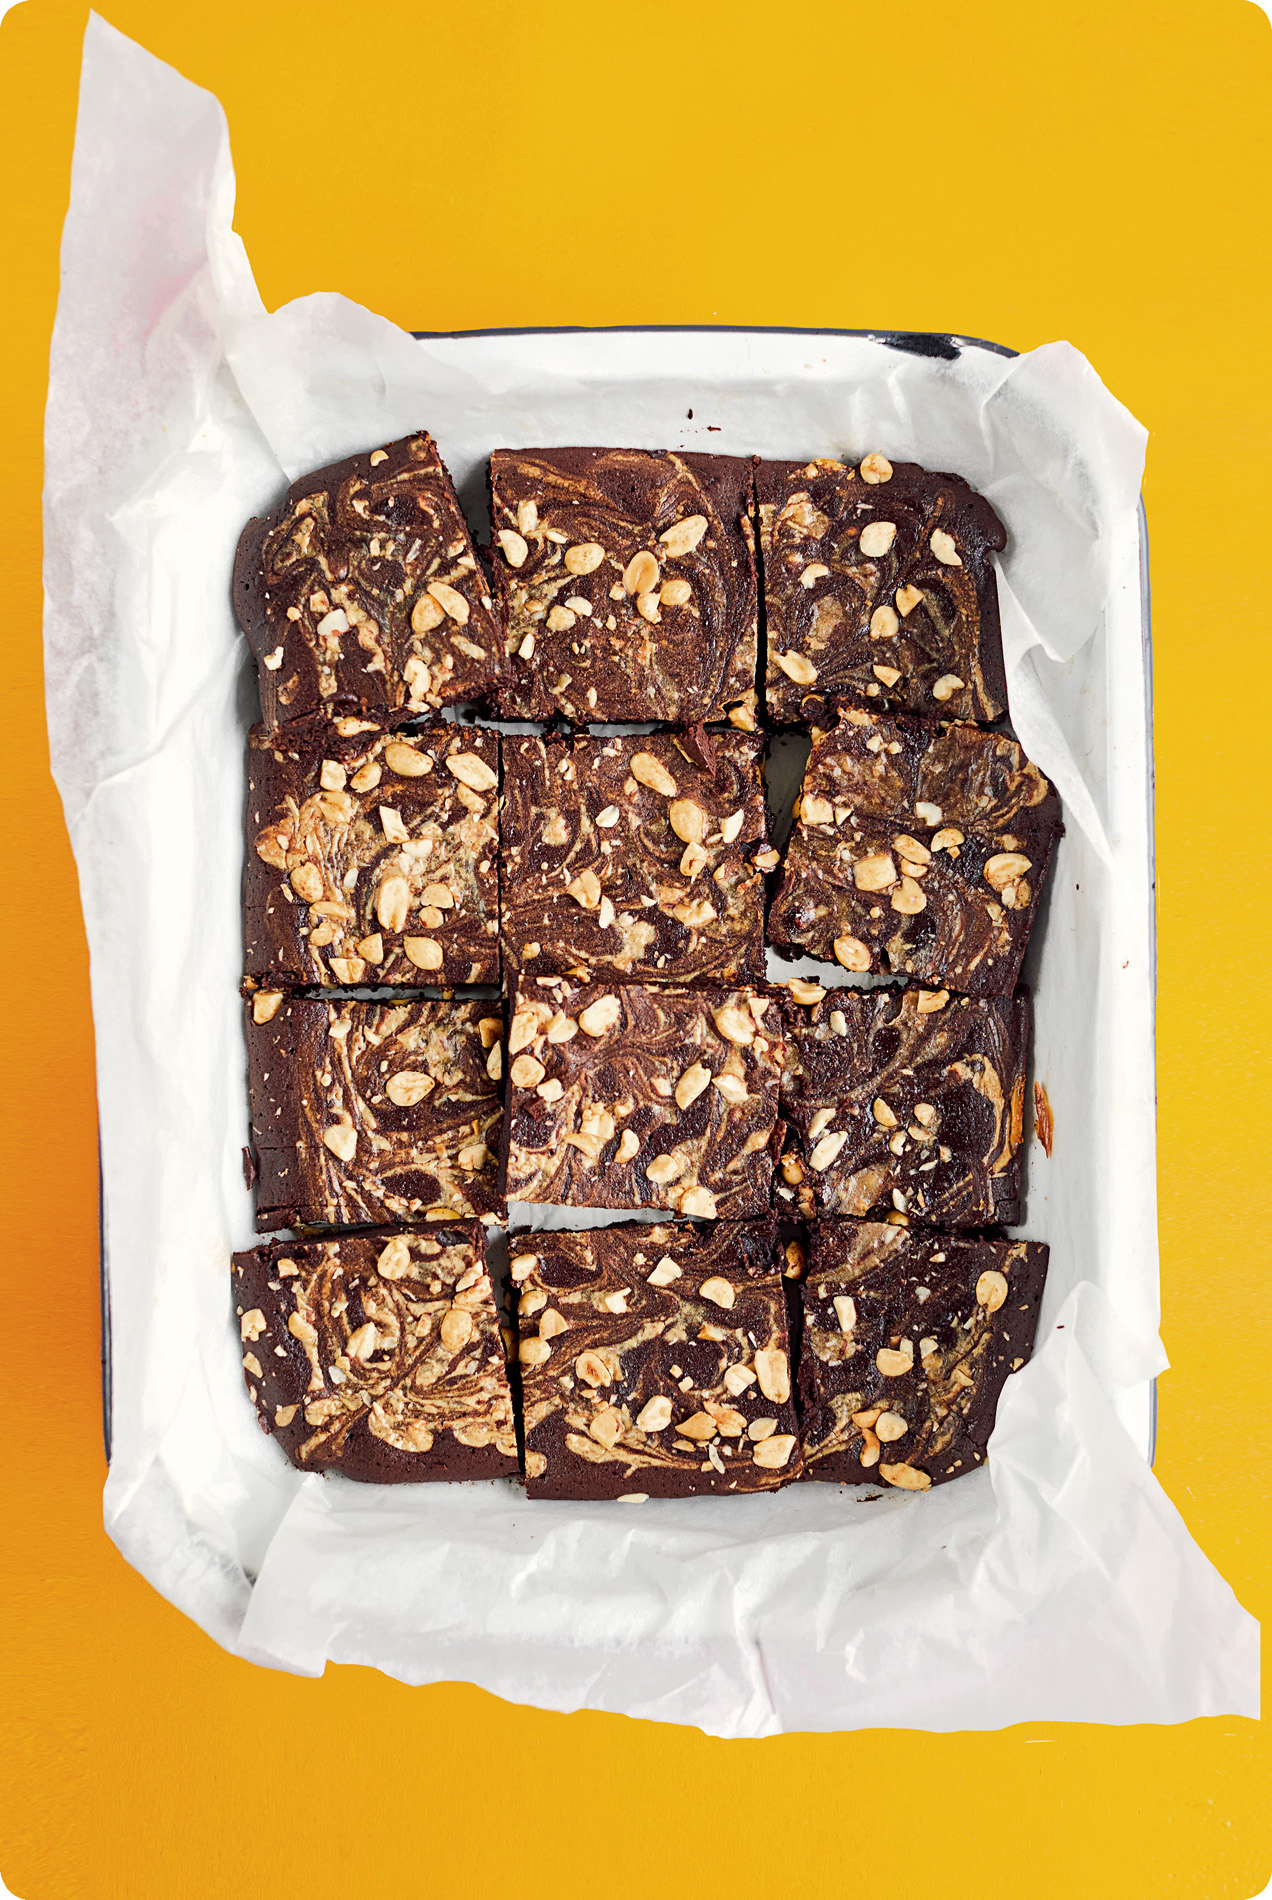
SALTED CHOCOLATE PEANUT BROWNIES
If you’re looking for a traybake to take to a party, look no further. Chocolate and peanut might be one of my favourite combinations, and this supersized brownie is absolutely delicious, as well as beautiful. If you’re serving it warm as an after-dinner dessert, bring a bowl of crème fraîche to the table, as it’s very rich.
Serves: 12+
Prep: 10 minutes
Cook: 15–20 minutes
170ml olive oil
250g soft dark brown sugar
100g dark chocolate, chopped (70% cocoa solids minimum)
85g plain flour
85g cocoa powder
140ml milk
4 free-range eggs
75g salted peanuts
50g crunchy peanut butter
Preheat the oven to 160°C fan/180°C/gas 4, and oil and line a 30 × 37cm roasting or baking tin with non-stick baking or greaseproof paper. Melt the olive oil, dark brown sugar and chocolate together in a saucepan. Let it cool down for a minute, then whisk in the flour, cocoa, 100ml of the milk and all of the eggs until smooth.
Stir through three-quarters of the salted peanuts, then transfer to the lined tin. Beat the crunchy peanut butter with the remaining 40ml of milk – it should be the consistency of double cream – then drop spoonfuls over the chocolate batter and swirl them in with the wrong end of a teaspoon. Scatter over the remaining peanuts, then bake for 15–20 minutes until just set on top, but still a little soft inside.
Let the brownie cool in the tin, then cut into squares when cool enough to handle. This will keep well in an airtight box for up to a week – if you can resist that long.
SALTED CHOCOLATE PEANUT BROWNIES
ROASTED APRICOTS WITH A ROSEMARY & HAZELNUT CRUMBLE
I love the combination of fresh apricots with hazelnuts. In this crumble, the rosemary adds a wonderful savoury note. Make it when you see the first boxes of apricots arrive in the summer. Any leftovers are an instant roasted fruit-and-granola breakfast the next day.
Serves: 6
Prep: 10 minutes
Cook: 25 minutes
10 large apricots, halved
30g soft light brown sugar, plus 2 tablespoons
30g softened unsalted butter
30g oats
30g plain flour
30g hazelnuts, roughly chopped
2 sprigs of fresh rosemary, leaves finely chopped
Crème fraîche, Greek yogurt, clotted cream, double cream or ice cream, to serve
Preheat the oven to 180°C fan/200°C/gas 6. Tip the apricots into a roasting tin or baking dish large enough to hold all the fruit in a single layer, then toss with the 2 tablespoons of soft light brown sugar and set aside while you sort out the crumble topping.
Beat the butter and 30g of sugar together until soft, then stir in the oats, flour, roughly chopped hazelnuts and rosemary. Work together with your fingers until you have a rough crumble texture, then scatter this over the apricots.
Transfer to the oven and roast for 25 minutes, until the crumble topping is golden brown and the apricots are cooked (they should yield when you prod them with a fork).
Serve hot, with any of the suggested accompaniments. Cold clotted cream is particularly nice, or Greek yogurt for breakfast the next day.
TIP: You can easily make this in advance, cool and refrigerate it, then warm it through in the oven for 10–15 minutes or so in an oven preheated to 150°C fan/170°C/gas 3 before serving.
ROASTED APRICOTS WITH A ROSEMARY & HAZELNUT CRUMBLE
CINNAMON CHERRY CLAFOUTIS
Clafoutis is the perfect dish to finish a dinner party – lighter than a cake, more interesting than a crème caramel – think of it as a smooth, baked, cherry-flecked custard. Traditionally a clafoutis is flavoured with vanilla, but I prefer cinnamon, not least because you can then add a crisp, non-canonical cinnamon-sugar topping. It’s very good served with extra-thick double cream or caramel ice cream. (Do make sure to use full-fat milk in the recipe, it makes all the difference.)
Serves: 8
Prep: 10 minutes
Cook: 30 minutes
650g cherries, washed, stalks removed (think about using frozen out of season)
90g caster sugar
25g unsalted butter, melted, plus a bit more for the dish
2 large free-range eggs
75g plain flour
1 teaspoon ground cinnamon
300ml full-fat milk
1 lemon, zest only
20g demerara sugar
1 tablespoon icing sugar
Preheat the oven to 180°C fan/200°C/gas 6. You’ll need a roasting tin or ceramic baking dish (round, oval, doesn’t matter) just large enough to hold all the cherries in a single layer. Check, remove the cherries, butter the dish, then return the cherries to it.
Mix the caster sugar with the melted butter in a large bowl until just incorporated, then beat in the eggs. Add the flour and ½ teaspoon of cinnamon, whisk until smooth, then whisk in the milk and lemon zest. Pour this mixture over the cherries, then transfer to the top shelf of the oven and bake for 30 minutes, until the custard is just set and the edges are lightly brown and risen.
Meanwhile, mix the demerara sugar and the rest of the cinnamon together.
Once cooked, scatter the clafoutis with the cinnamon sugar, then let it cool for a good half an hour before serving warm. Sift over the icing sugar and serve with ice cream, crème fraîche or extra-thick double cream.
NOTE: Some recipes for clafoutis call for the stones to be removed, but this is both time-consuming and unnecessary, as they add flavour as it cooks. Just warn your guests that there are stones in ‘because it’s authentic’ and they can neatly line them up on the sides of their plates.
CINNAMON CHERRY CLAFOUTIS
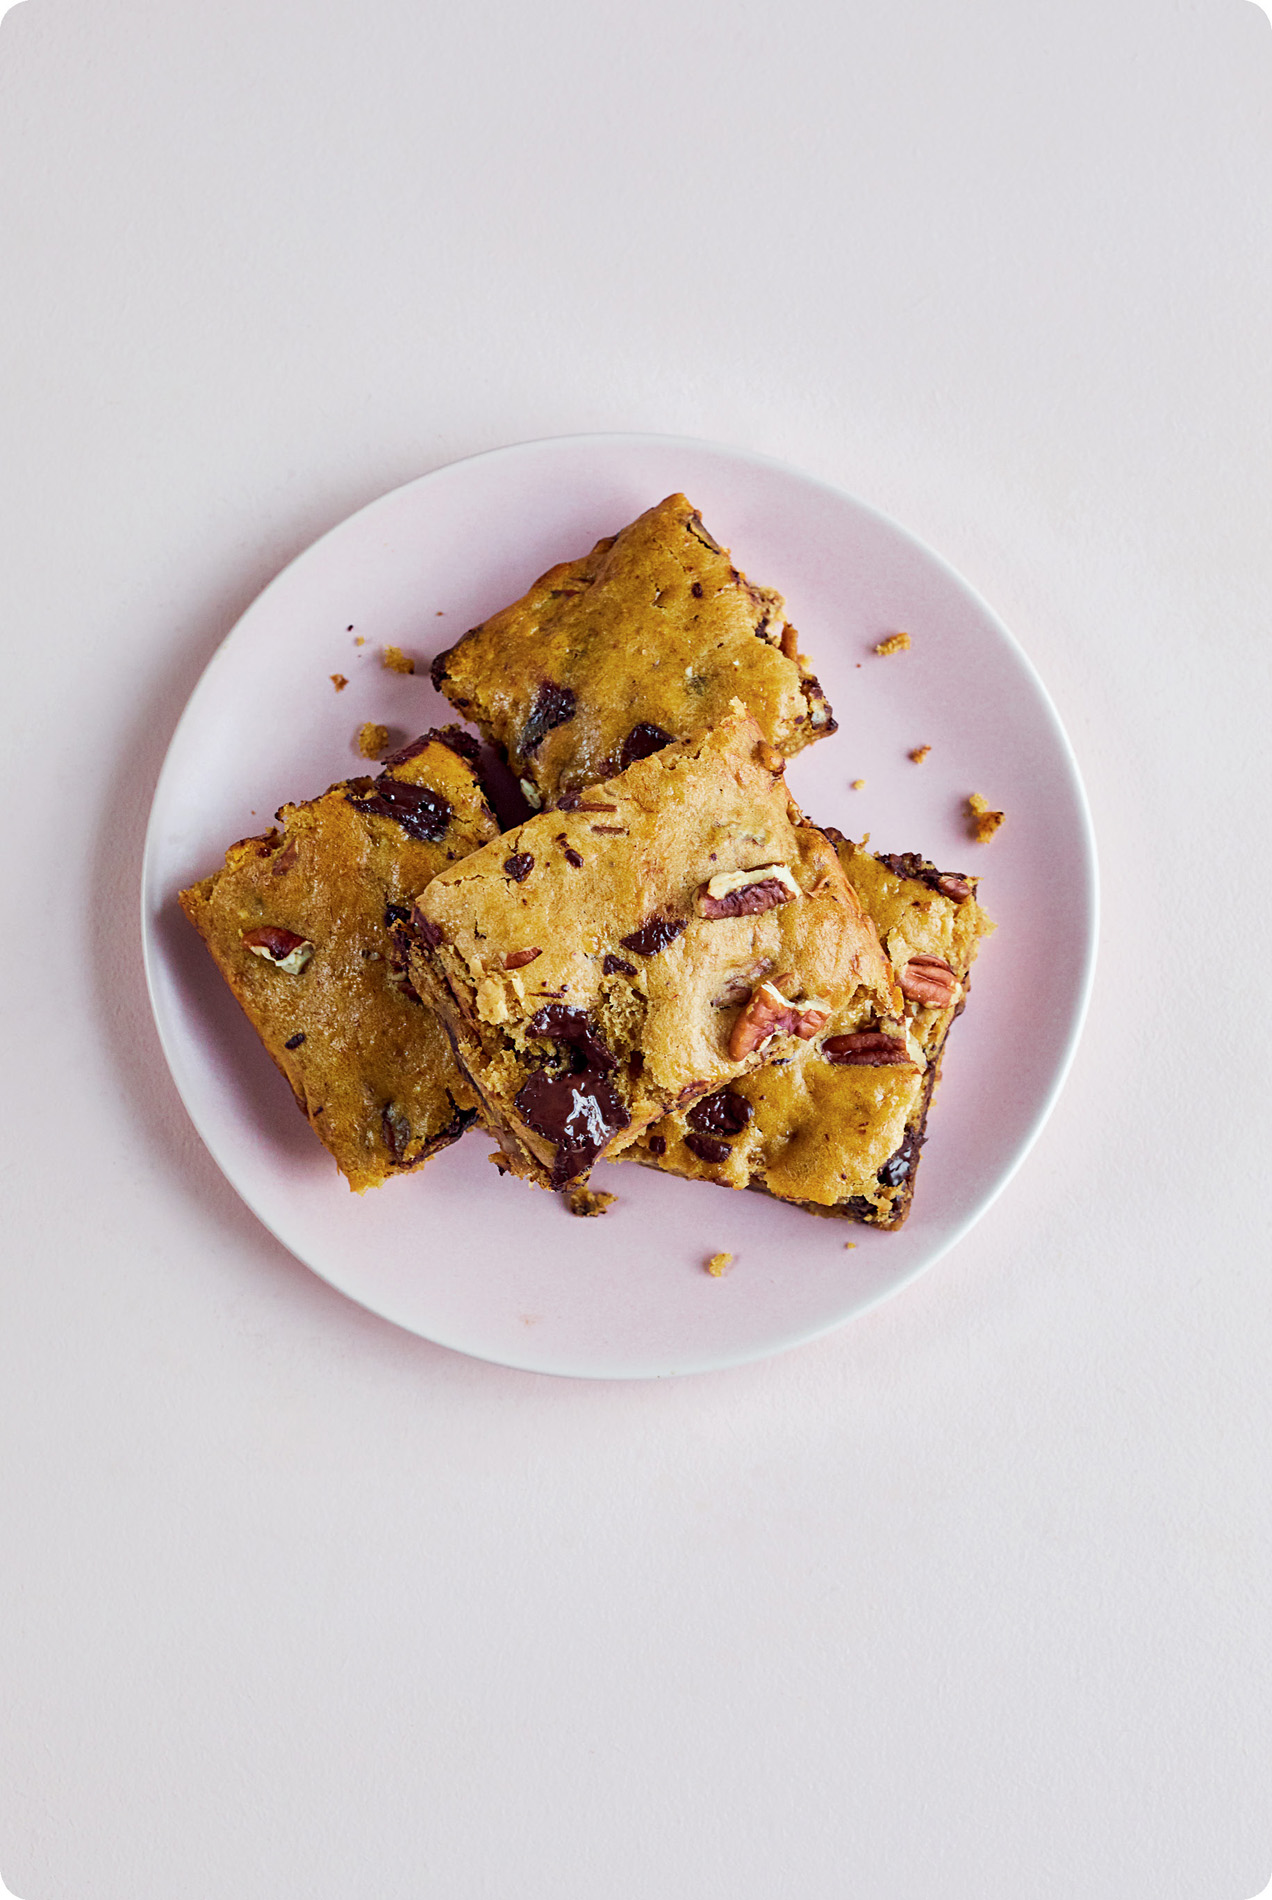
PECAN CHOCOLATE CHIP BANANA BREAD
VEGAN
This is one of the nicest versions of banana bread I’ve ever had and it’s perfect for vegans, or if you need an emergency bake and are all out of eggs and butter. Credit goes to my friend Alex, who brainstormed this dessert chapter with me at work and very sensibly suggested that I include a banana bread (and the one here was made by her for this book’s photo shoot too). Hands down one of my favourite cakes.
Serves: 8-10
Prep: 10 minutes
Cook: 20 minutes
3 ripe-to-overripe bananas, mashed (about 300g when peeled)
75ml olive oil
80g soft dark brown sugar
2 clementines, zest and juice
250g self-raising flour
2 teaspoons baking powder
100g vegan dark chocolate (70% cocoa solids minimum) cut into small chunks
100g pecan nuts, roughly broken
Preheat the oven to 160°C fan/180°C/gas 4, and line a medium roasting tin or baking dish with non-stick baking or greaseproof paper.
Whisk the mashed bananas with the olive oil, sugar and clementine zest and juice until fairly smooth, then stir in the flour and baking powder. When they just start to combine, stir through three-quarters of both the dark chocolate and the pecan nuts.
Smooth the batter into the prepared tin (don’t worry, it should look pretty doughy), then scatter with the remaining dark chocolate and nuts. Transfer to the oven and bake for 20 minutes, until well risen and a cake tester or skewer inserted in a non-chocolatey area comes out clean.
Let it cool in the tin for 5 minutes before transferring to a wire rack. This is best eaten warm, but will keep in an airtight tin for a two or three days.
NOTE: If you don’t already have a preferred vegan dark chocolate, many good-quality dark chocolate bars with 70% or higher cocoa solids are vegan as they don’t contain any milk – just check the label if unsure.
PECAN CHOCOLATE CHIP BANANA BREAD
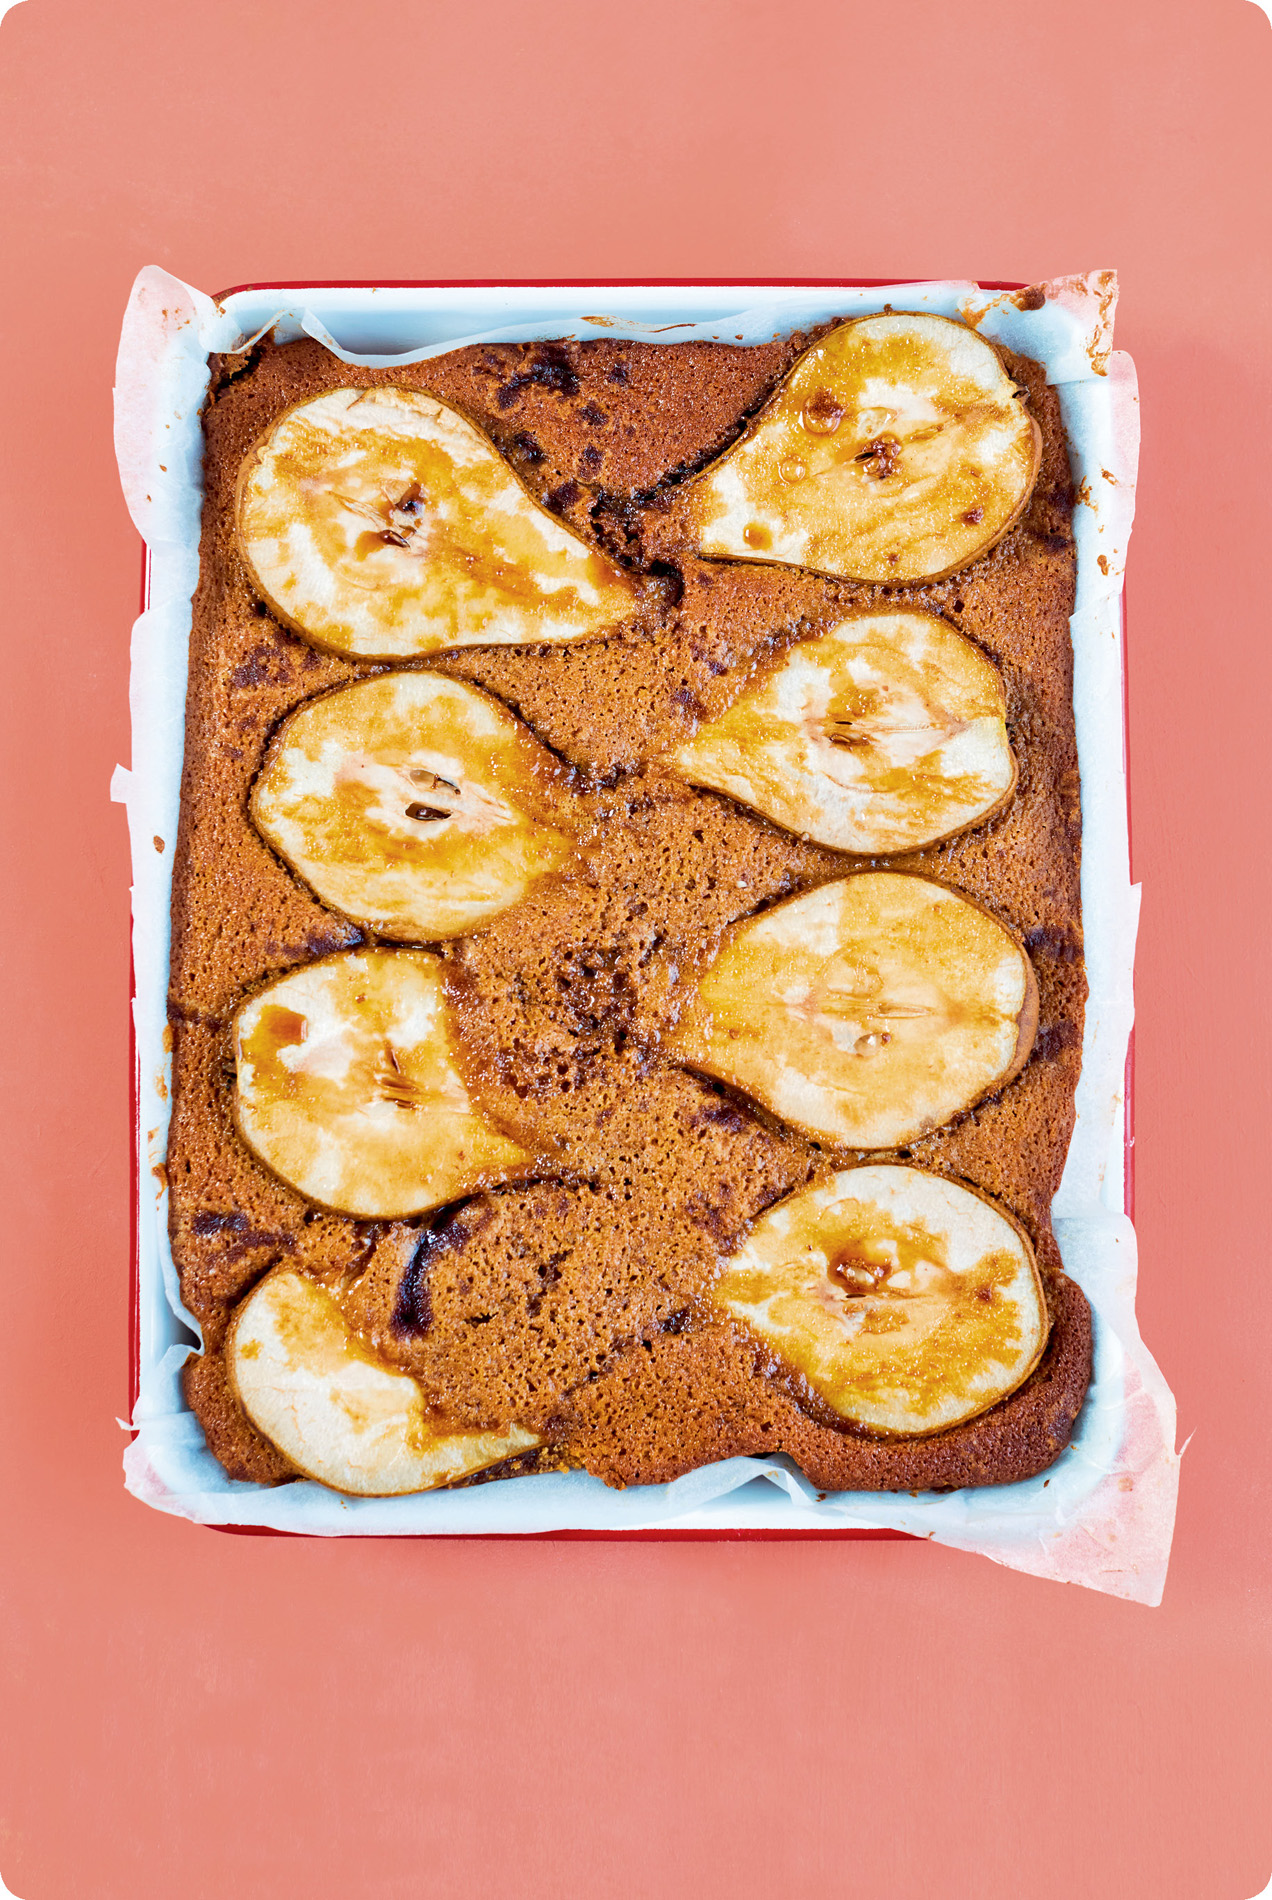
GINGERBREAD PEARS
I love ginger, so this recipe incorporates three kinds: ground, fresh and stem. Despite that, it’s a very light gingerbread, which works perfectly with the sunbathing penguin-style baked pears. Serve cold for an afternoon snack, or warm to finish off an autumnal dinner with thick double cream or crème fraîche.
Serves: 8
Prep: 10 minutes
Cook: 25–30 minutes
60g unsalted butter, plus more for the tin
125g dark brown sugar, plus a few extra pinches
2½ cm fresh ginger, grated
1 free-range egg
100ml milk
115g self-raising flour
1 teaspoon ground ginger
3 cardamom pods, seeds ground, pods discarded
½ teaspoon baking powder
4 slim pears, halved
1 ball of stem ginger in syrup, roughly chopped
Preheat the oven to 160°C fan/180°C/gas 4 and line and butter a 28 × 22cm roasting or baking tin with non-stick or greaseproof paper.
Beat the butter and sugar together until smooth, then whisk in the fresh ginger, egg and milk. Stir in the flour, ground ginger, ground cardamom and baking powder and mix briefly until combined.
Tip the gingerbread batter into the lined tin, then arrange the halved pears across the cake as shown here. Scatter a pinch of dark brown sugar and a few bits of chopped stem ginger over each pear, then transfer to the oven and bake for 25–30 minutes, until the cake is risen and firm to the touch.
Let the cake cool down in the tin for 5 minutes before transferring it, with its paper, to a wire rack to cool a little. Serve the gingerbread warm or at room temperature.
NOTE: As it has fresh fruit in it, you’ll have to store any leftover gingerbread in the fridge. Warm slices through briefly in the oven or microwave before serving.
GINGERBREAD PEARS
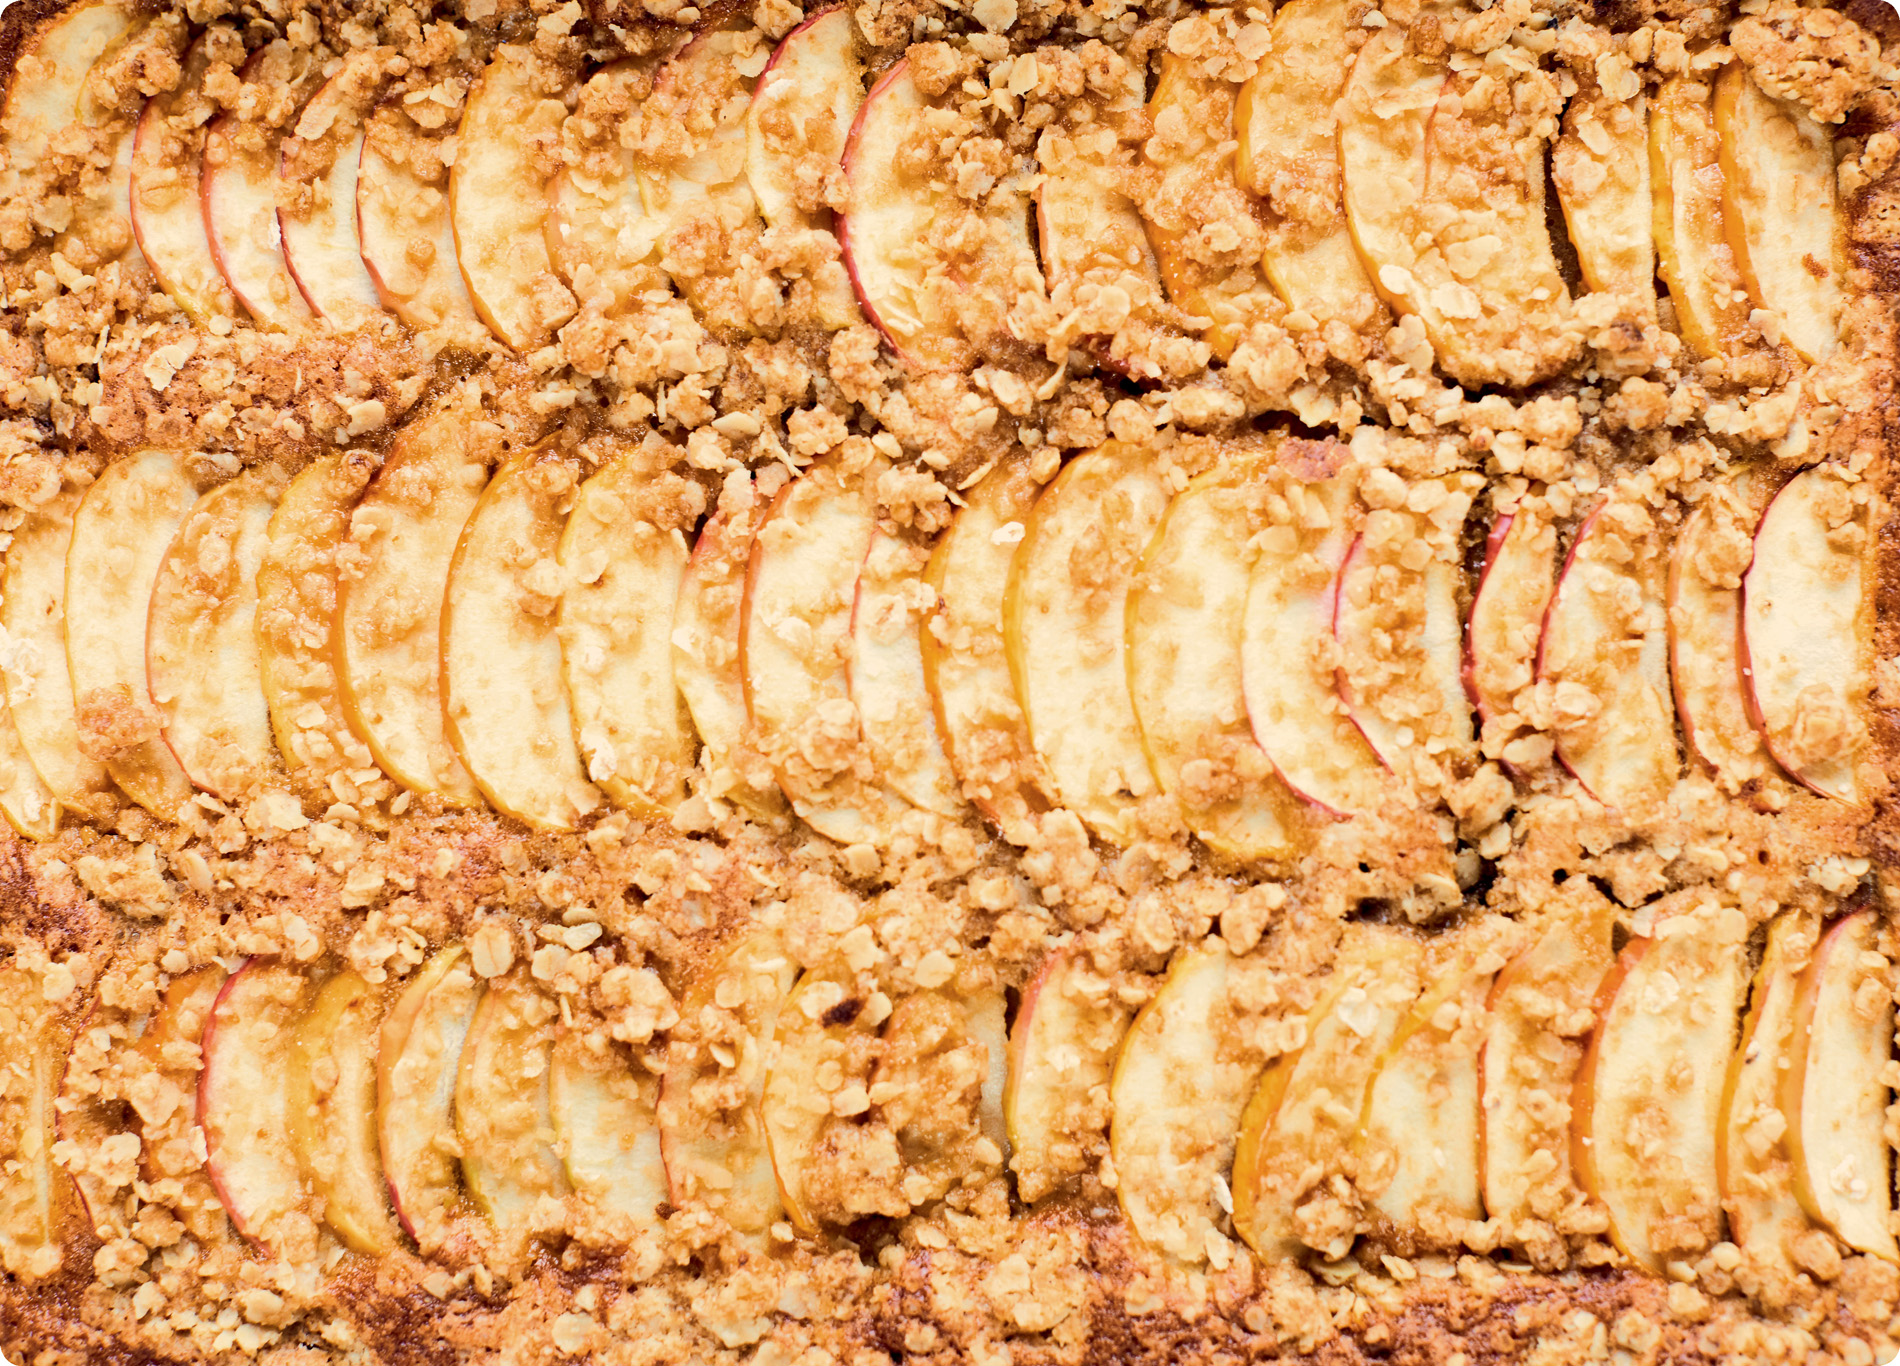
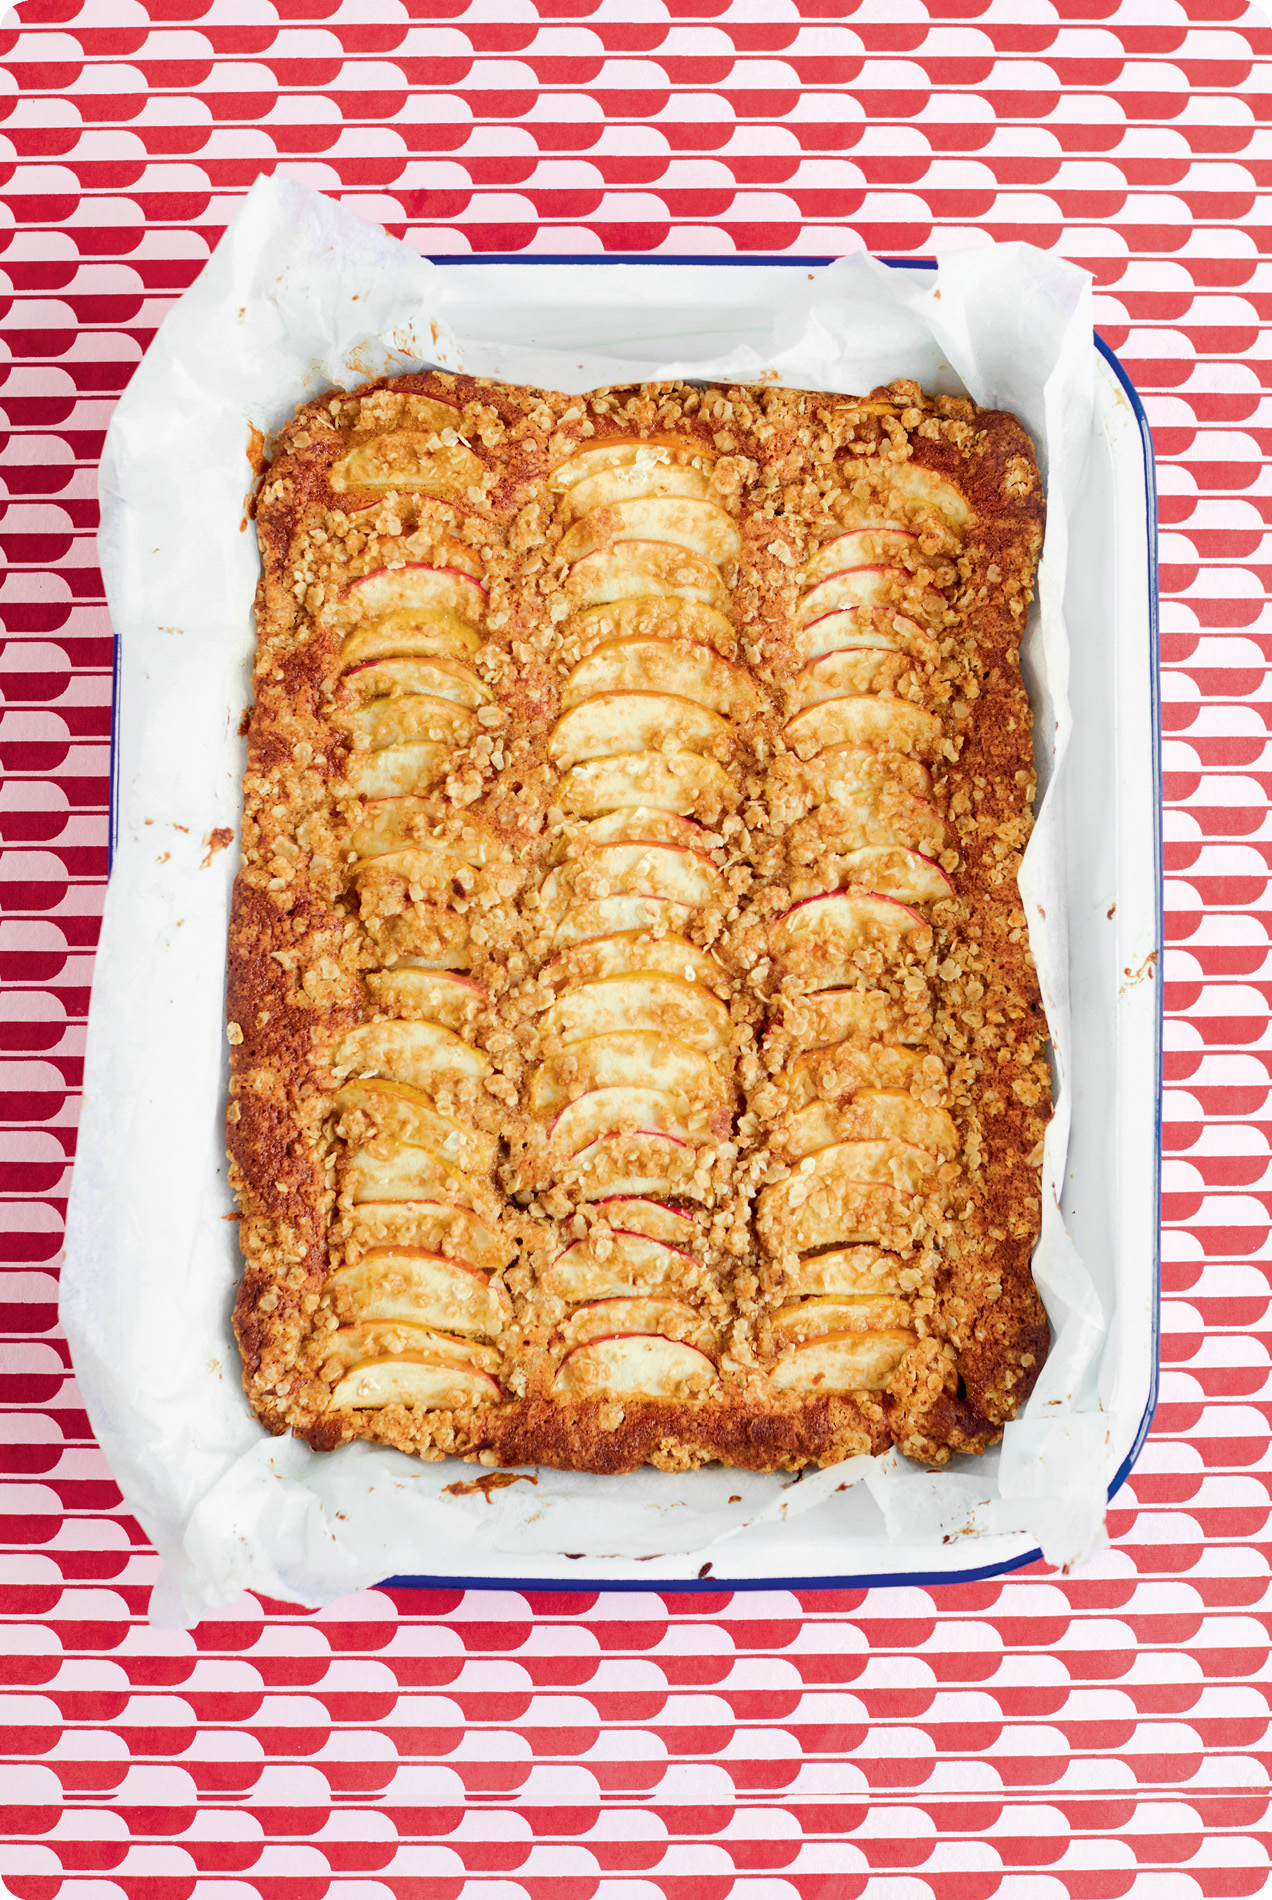
APPLE CRUMBLE CAKE
I feel like a slice of this cake would work at any time of day. Hot out of the oven, it’d also do nicely as pudding on an autumnal evening, with a bowl of crème fraîche on the side.
Serves: 8
Prep: 10 minutes
Cook: 30 minutes
FOR THE CAKE
2 apples, cored and finely sliced
½ a lemon, juice only
225g softened unsalted butter, plus more for the tin
225g soft light brown sugar
4 free-range eggs
225g self-raising flour
½ teaspoon baking powder
1 teaspoon ground allspice
1 heaped teaspoon ground cinnamon
FOR THE CRUMBLE TOPPING
25g demerara sugar (use soft light brown sugar if you don’t already have or won’t regularly use demerara)
25g softened unsalted butter
25g plain flour
25g oats
Preheat the oven to 180°C fan/200°C/gas 6, and line and butter a 30 × 37cm roasting or baking tin with non-stick or greaseproof paper. Slice the apples and dress them with a little lemon juice to stop them going brown.
Beat the butter and sugar together until smooth, then whisk in the eggs, one by one. Gently stir in the flour, baking powder and spices until just combined.
Transfer the cake batter into the lined tin, and top with the sliced apples in a design of your choice. I like to make them slightly overlapping, as here.
Beat the demerara sugar and butter together, then stir in the flour and oats and work with your fingertips into a rough crumble. Scatter this over the cake, then transfer to the oven and bake for 30 minutes, until the topping is golden brown and a skewer inserted into the cake comes out clean.
Let the cake cool in the tin for 5 minutes before lifting it out with its paper on to a wire rack to cool down. Serve warm with crème fraîche, or at room temperature.
APPLE CRUMBLE CAKE
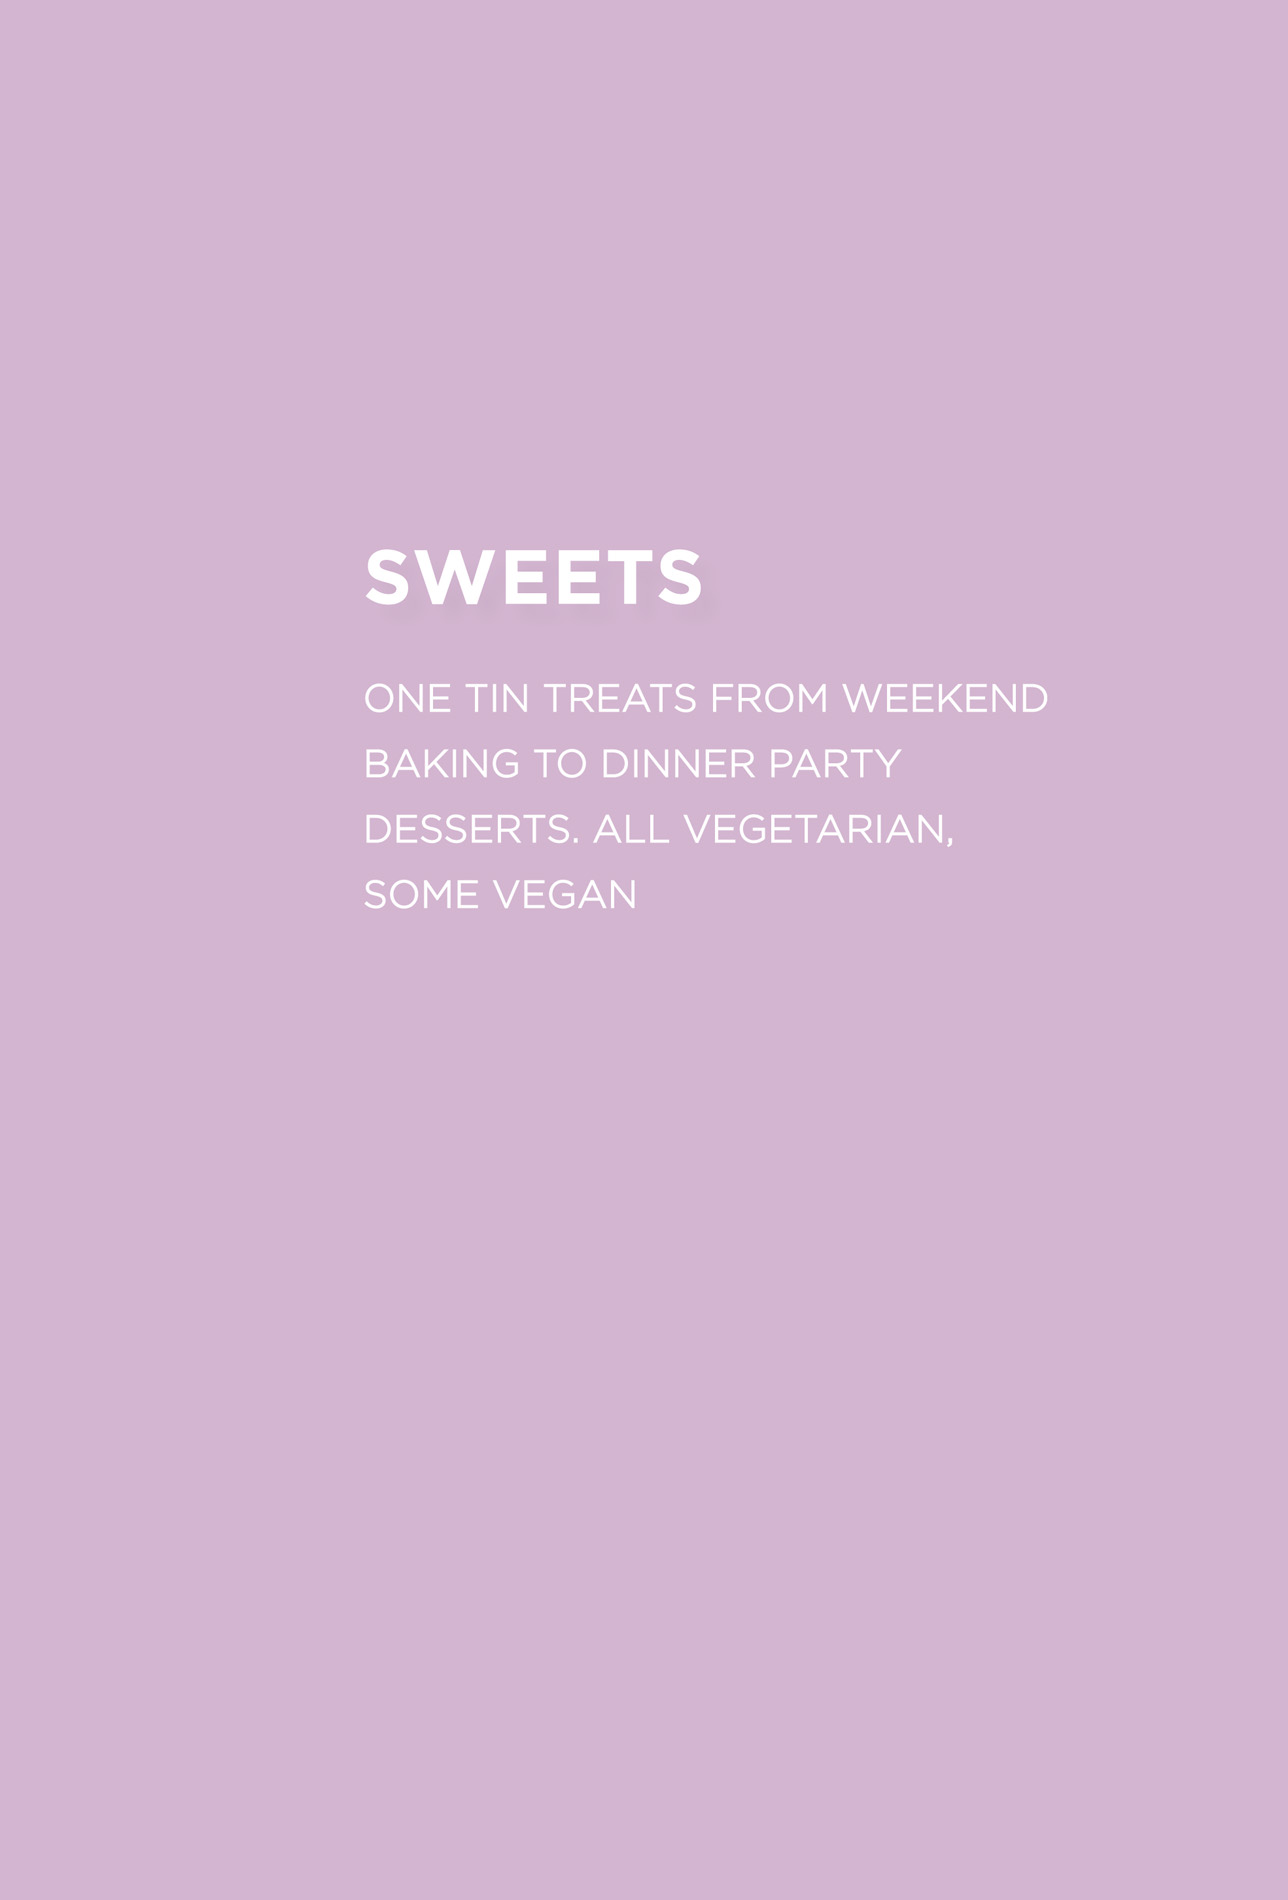
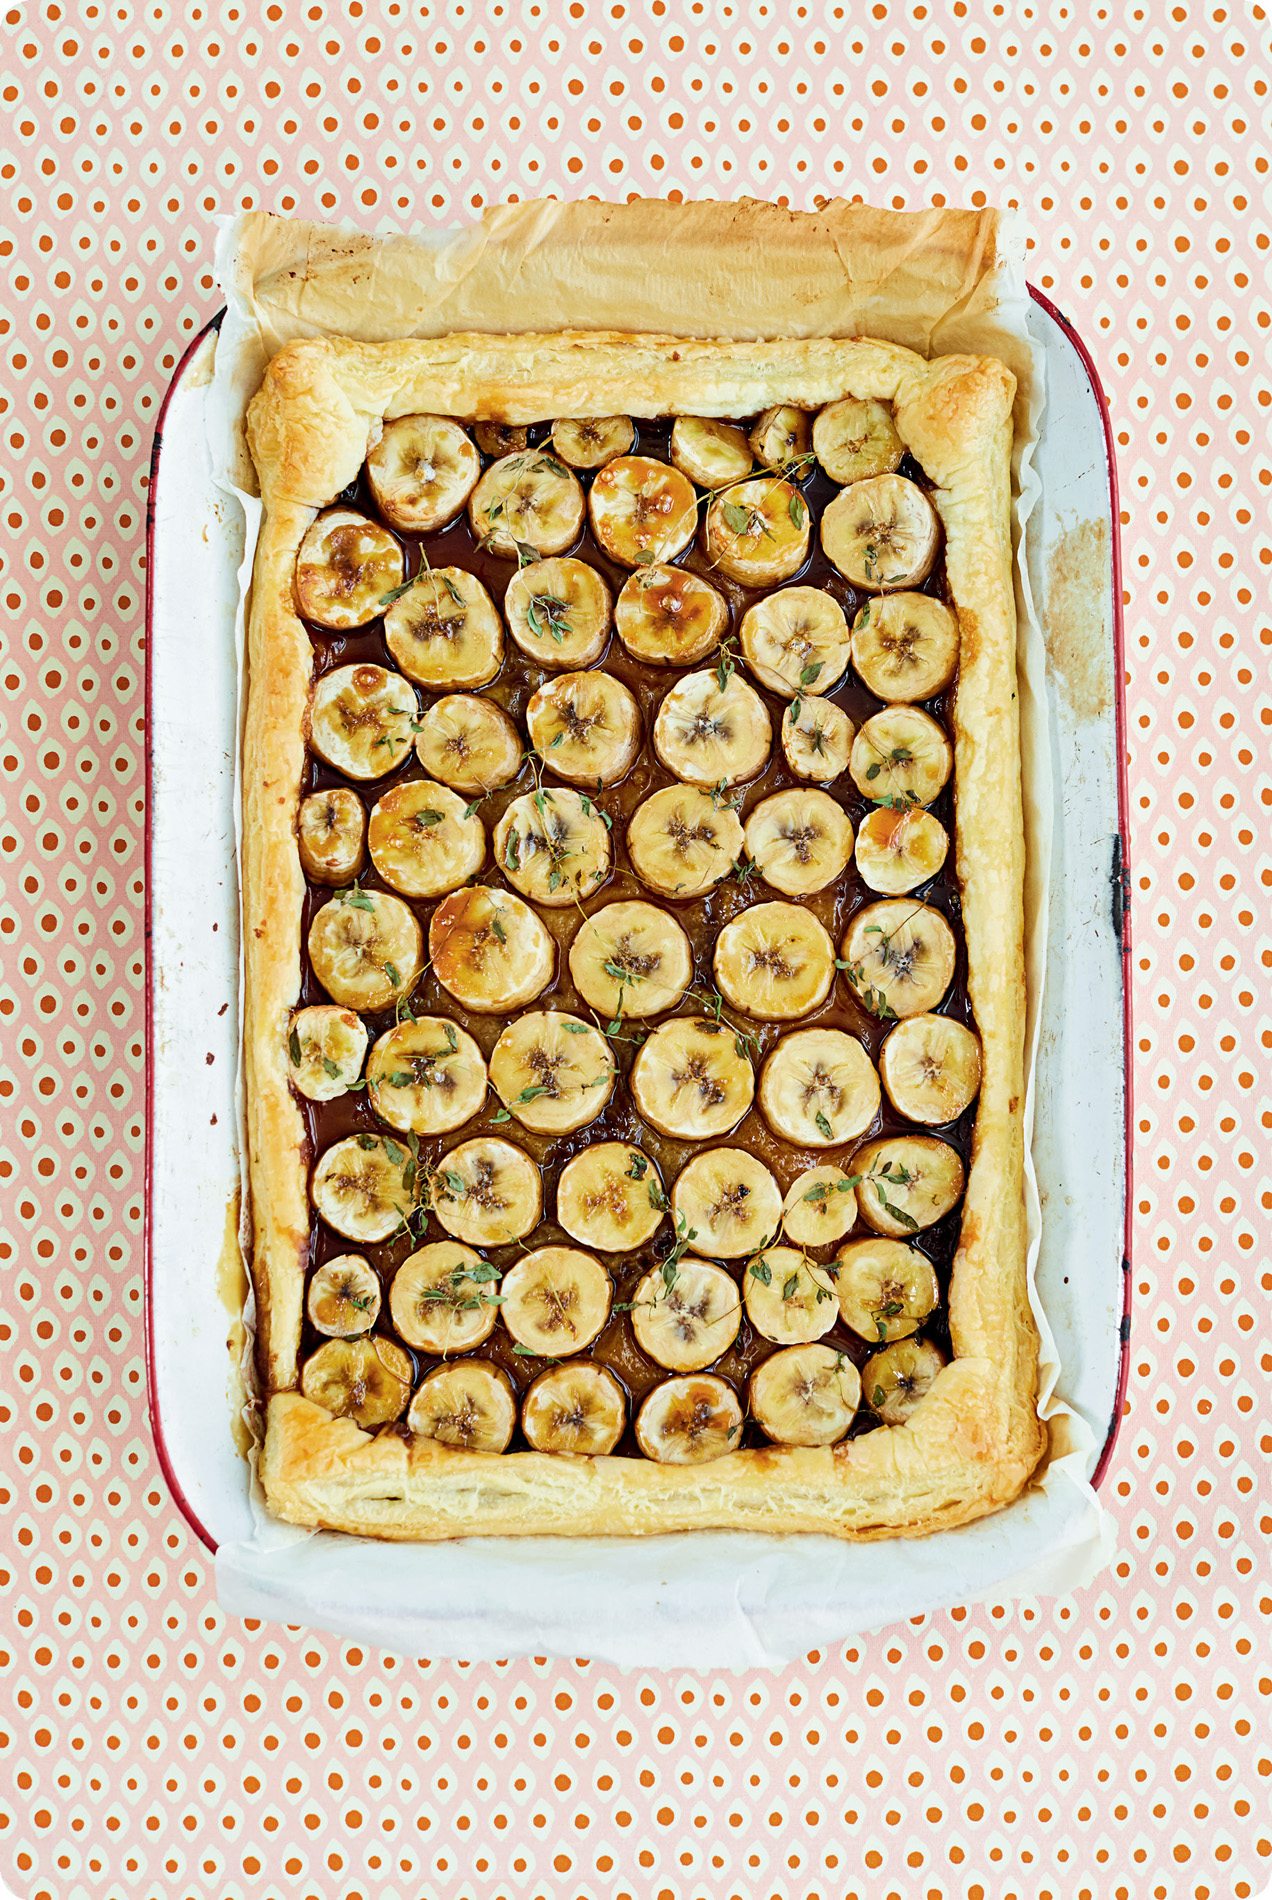
CARAMELISED BANANA & THYME TARTE TATIN
VEGAN
I would always suggest that you keep an emergency roll of puff pastry in the fridge and, if you do, this incredibly quick four-ingredient dessert is just the thing to serve if you need a pudding in a hurry. The caramelised bananas work beautifully with the thyme. Serve with a scoop of vegan vanilla or coconut ice cream.
Serves: 6 generously
Prep: 10 minutes
Cook: 25 minutes
1 × 320g ready-rolled vegan puff pastry sheet
70g dark brown sugar
3–5* just-ripe to underripe bananas, sliced into ½ cm coins
5–6 sprigs of fresh lemon thyme
Vegan vanilla or coconut ice cream, to serve
* The number you’ll need will depend on the size of the bananas – buy 5, and eat the others if you don’t need them for the tart.
Preheat the oven to 180°C fan/200°C/gas 6. Lay the pastry in a roasting tin (you can leave it on the baking paper that it comes wrapped in), ideally one just the right size for the pastry to start coming up the sides of the tin. Prick the base all over with a fork, then scatter over half the brown sugar, leaving a 1cm border around the edges.
Arrange the sliced banana coins on top as close together as you can (they’ll shrink on cooking), then scatter thickly with the remaining dark brown sugar and the sprigs of lemon thyme.
Transfer the tart to the oven and bake for 25 minutes, until the pastry is crisp and golden brown. Don’t panic if the tart has risen in the middle, just prod it with a fork until it subsides, then gently tip the tin from side to side so the caramel is evenly distributed. Let it cool down for 10 minutes – it’ll help set the caramel for a crisp base – then serve with vegan ice cream on the side.
CARAMELISED BANANA & THYME TARTE TATIN
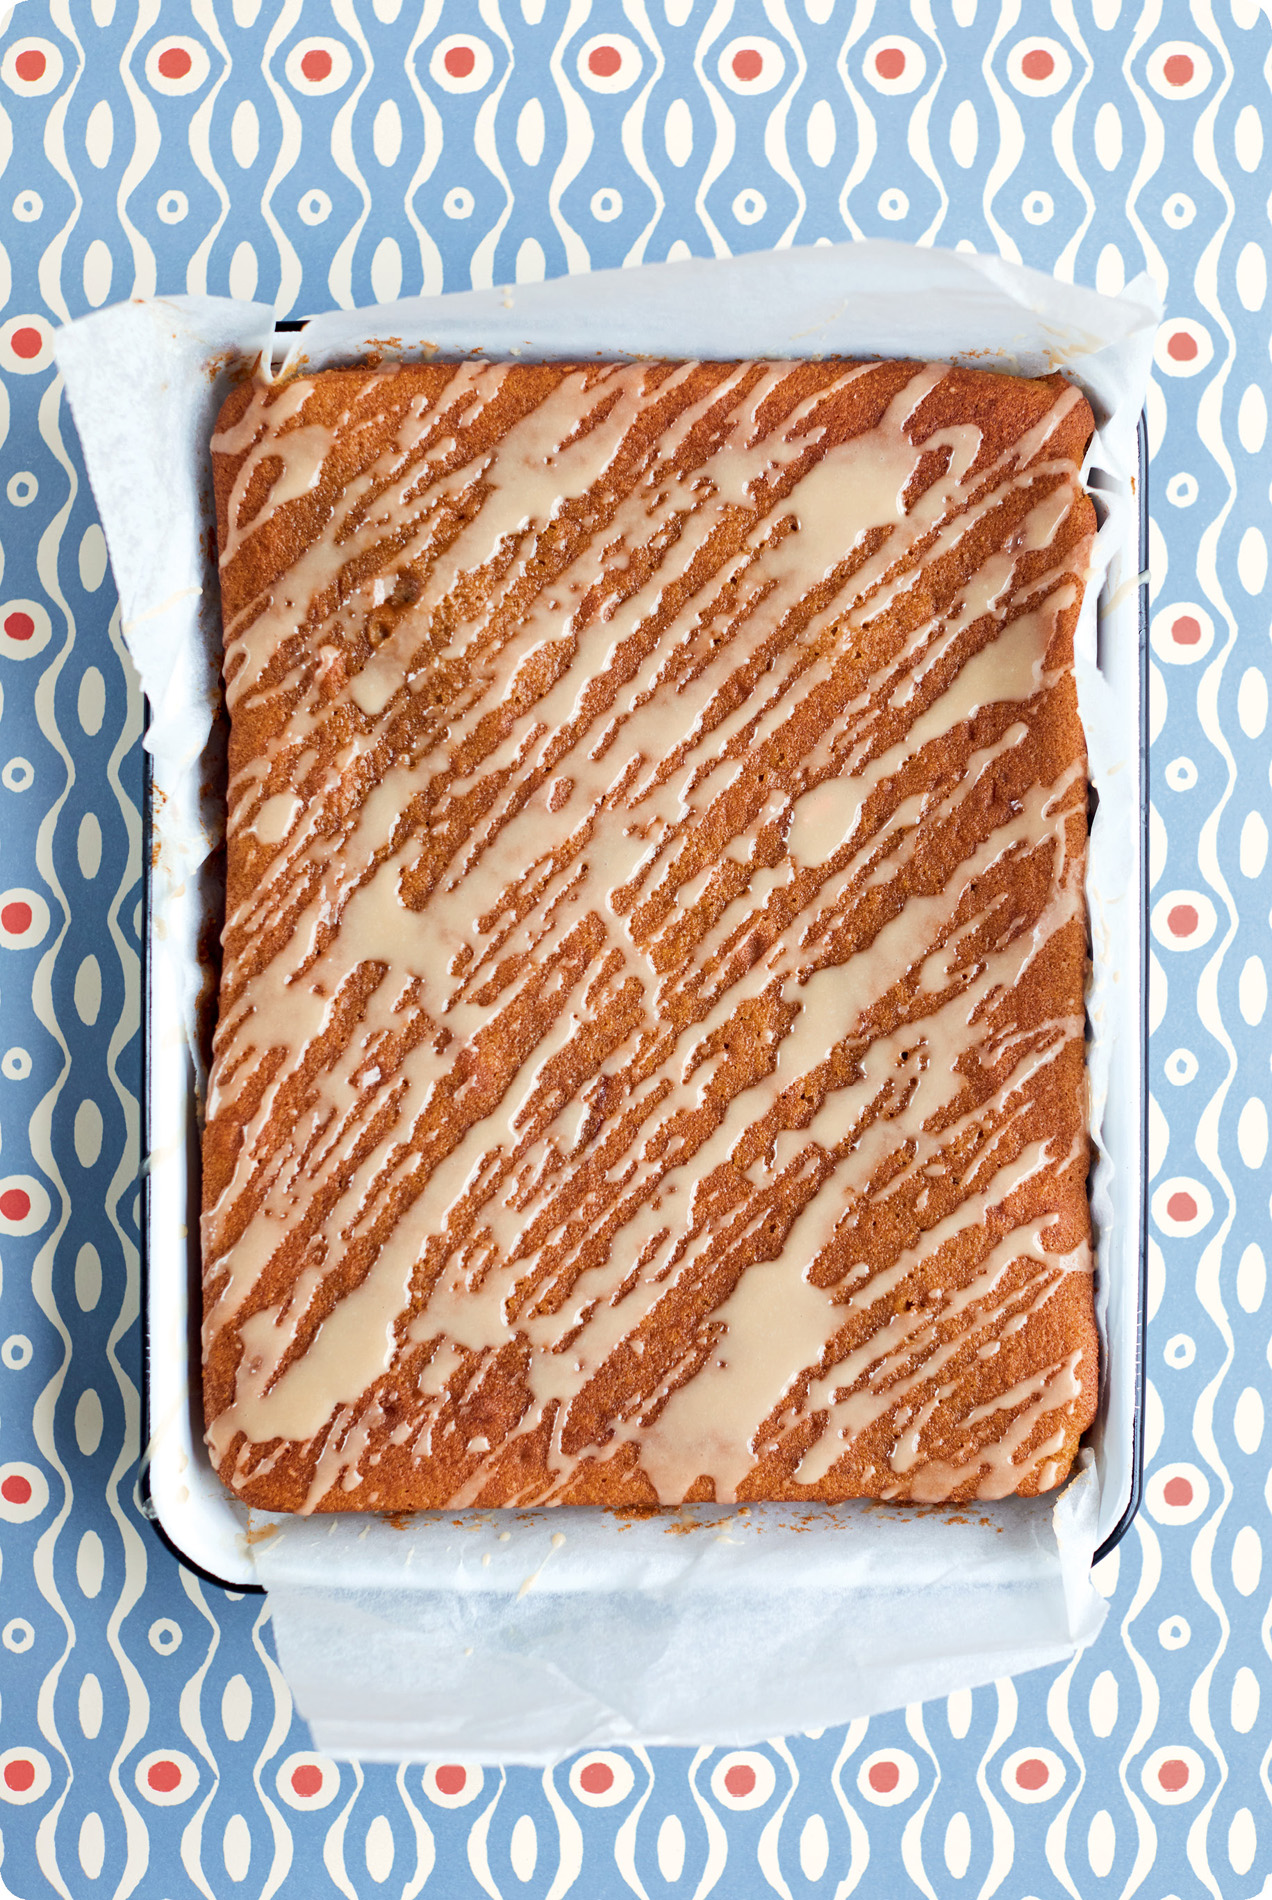
COFFEE & BAILEYS CAKE
Coffee with Baileys was my late godmother Mamie’s favourite drink and was invariably offered to me on visits, though once she drew into her nineties, I’d head into the kitchen to make it for us instead. I reckon she’d have approved of this wonderfully light coffee cake, spiked with Baileys and perfect for an afternoon chat.
Serves: 10
Prep: 10 minutes
Cook: 25 minutes
175g unsalted butter, plus more for the tin
160g soft light brown sugar
3 free-range eggs
175g self-raising flour
½ teaspoon baking powder
2 teaspoons good instant coffee (I like Nescafé Azera)
25ml boiling water
50ml Baileys
FOR THE ICING
75g icing sugar
30ml Baileys
Preheat the oven to 160°C fan/180°C/gas 4 and line and butter a 28 × 22cm roasting or baking tin, with non-stick baking or greaseproof paper.
Beat the butter and sugar together until smooth, then whisk in the eggs, one by one. Stir in the flour and baking powder, then make up the coffee with the boiling water and stir in the Baileys. Tip this into the cake batter and gently stir until the mixture is smooth.
Transfer the cake batter into the lined tin, then bake for 25 minutes until the cake is risen, firm to the touch and a skewer inserted comes out clean. Let it cool in the tin for 5 minutes before gently lifting it out, with its paper, to cool.
Once the cake is cool, mix the icing sugar and Baileys together to make a thin, pourable icing. Drizzle it over the cake and let the icing set before serving.
NOTE: For Mamie’s coffee, take 2 mugs of full-fat milk and heat in the microwave for 3 minutes. Carefully remove, then stir 2 teaspoons of good coffee powder into each mug. Add a splash of Baileys, stir, then serve. It will be too hot to drink for quite a while, so there’s lots of time to have a nice chat with your coffee-companion in the meantime.
COFFEE & BAILEYS CAKE
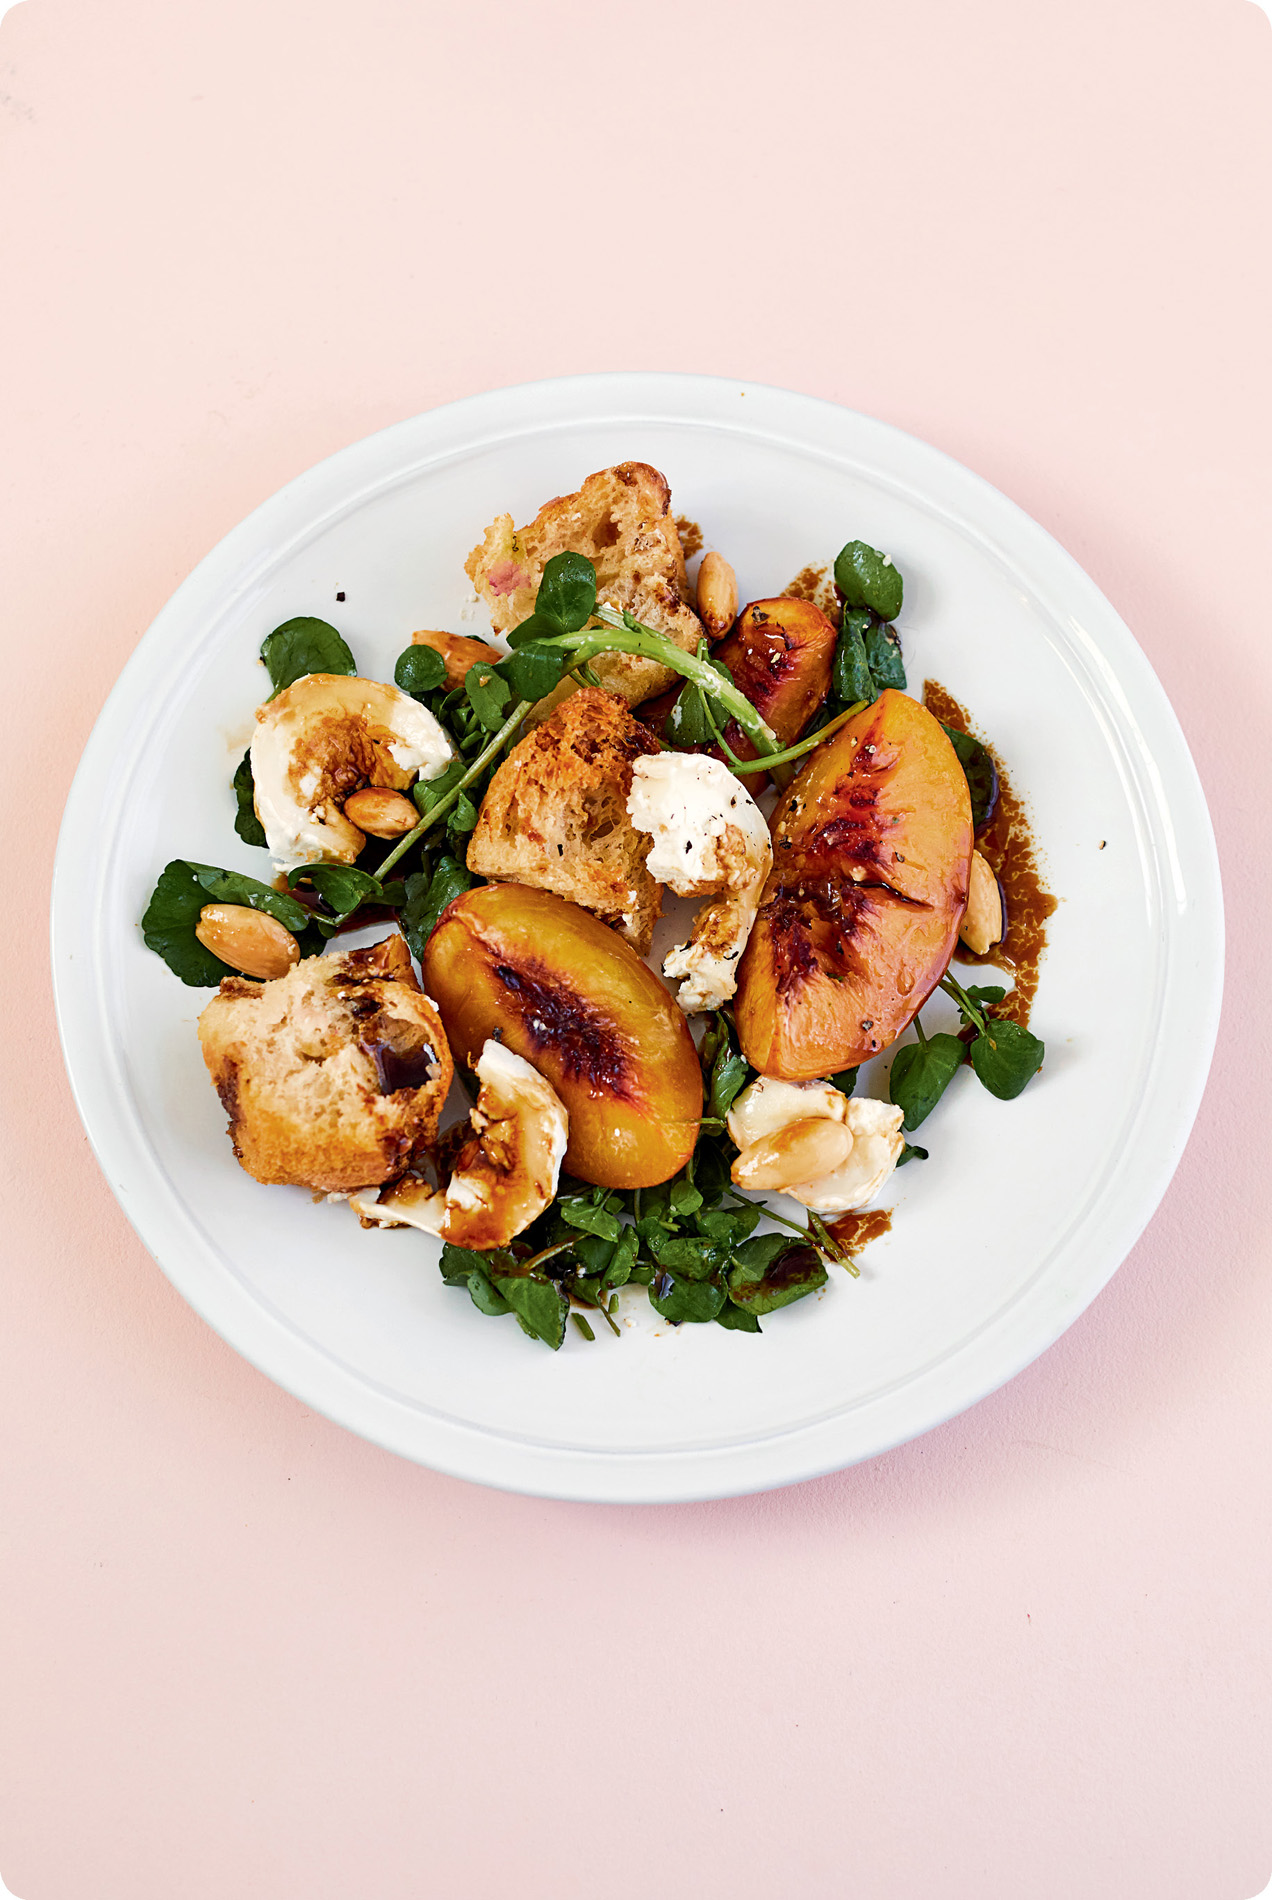
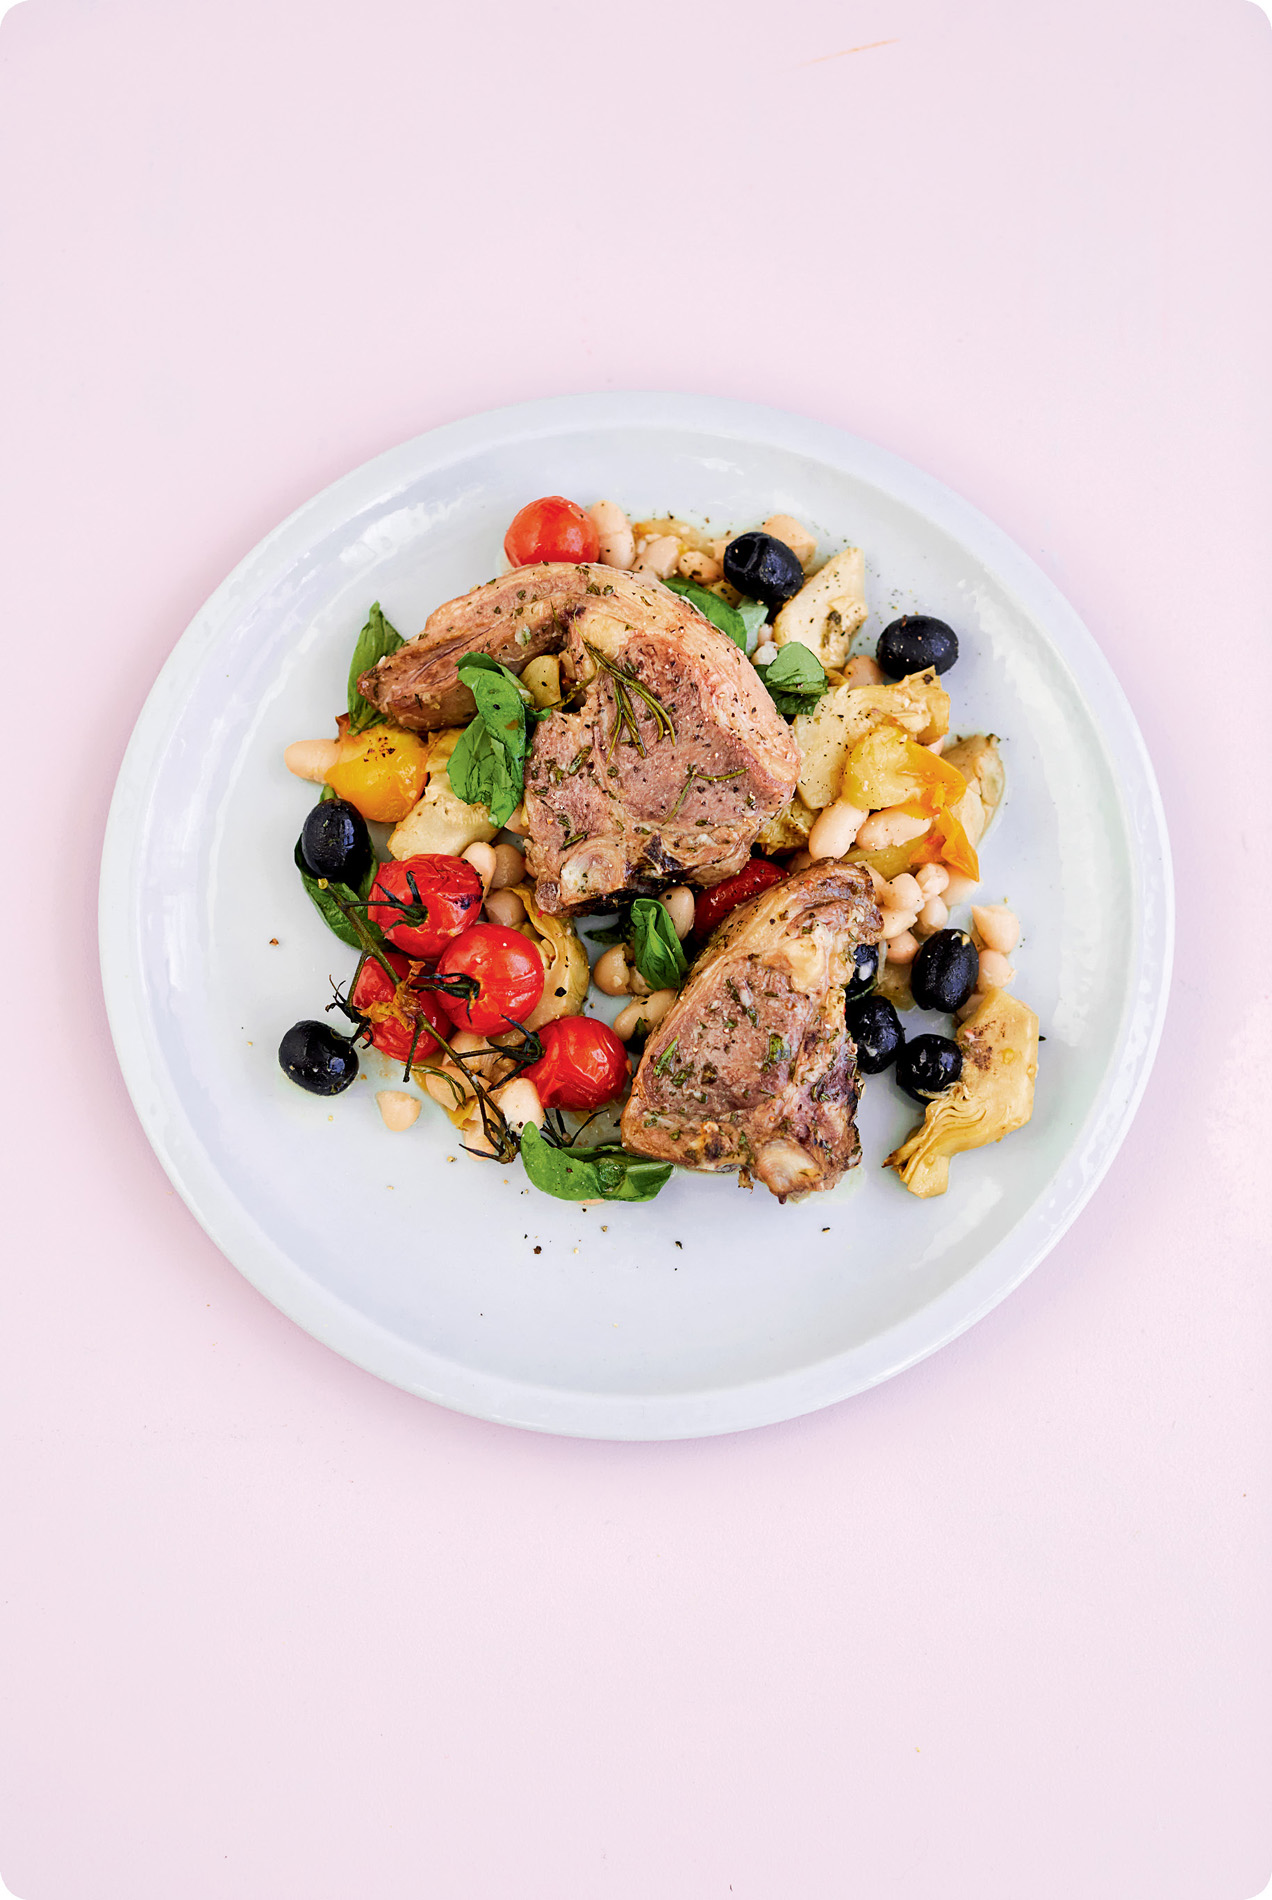
A NOTE ON PLATING
The beauty of roasting tin dinners that they’re oven-to-table dishes, where everyone piles in and helps themselves. However, if you’re doing dishes from the Date Night chapter or the starters from Feed a Crowd, you may wish to ‘plate up’ before taking your dishes through to the table (though this is of course by no means necessary).
You could write a book on exactly why some plates are aesthetically pleasing and some aren’t (and incidentally, my friend and fellow food stylist Frankie Unsworth has done just that – The New Art of Cooking – which I’d recommend to anyone interested in making food look as delicious as it tastes).
So, I have scattered examples of how I would plate up a dish attractively though the book and would limit my advice to the following:
ODD NUMBERS
Three or five things on a plate look better than two or four. For example, the roasted fig salad on page 86 or the nectarine and goat’s cheese salad on page 130 work beautifully as dinner party starters and will look best if you put an odd amount of fruit on the plate.
ASYMMETRY
Food looks nice off centre on plates, you don’t have to arrange everything in the middle. For example, if I was plating the pistachio crusted lamb (page 112) or the pomegranate duck (page 116), I would put a pile of the vegetables or grains slightly off-centre in the middle of the plate and then lay the slices of lamb or duck on the other side.
LEAVES AND HERBS
Keep them in the fridge and dress with your oil and citrus dressing just before plating up, so they don’t wilt. If you’re putting something like chopped mint leaves through a dish, like the pomegranate duck (see page 116), consider pinching out the little mint tips to scatter over the dish just before serving.
GARNISHES
If there are good-looking elements in a dish that you’d usually stir through (like pomegranate seeds, chopped nuts, chopped herbs), reserve a pinch of each to scatter over your plate just before serving. Also, freshly ground black pepper magically brings a plate together. (Don’t be too enthusiastic with this on date night.)
WARM PLATES
Visually, these make no difference. But I dislike hot food on cold plates as much as everyone else hates burning their hands on too-hot plates. The answer? Run your plates under a hot tap to get the chill off before drying and plating up.